It happens every week… you start strong with “I’m gonna eat better!” energy, and by Wednesday, you’re staring at a sad salad that tastes like regret. Or worse, you cave and order takeout, because honestly, who has time to cook lunch every day?!
That’s where these low-carb meal prep lunches come in to save the week. They’re quick to make, easy to pack, and actually taste AMAZING. No bland chicken, no endless lettuce bowls, just real flavorful food that keeps you full and feeling good.
We all want lunch to be simple, satisfying, and maybe even a little exciting (because you deserve more than another turkey wrap). These recipes hit that sweet spot and are totally meal-prep friendly.
So grab those containers, crank up a little music, and let’s make low-carb lunches that don’t feel like “diet food”… they just feel like GOOD food!
Table of Contents
1. Garlic Butter Chicken with Zucchini Noodles
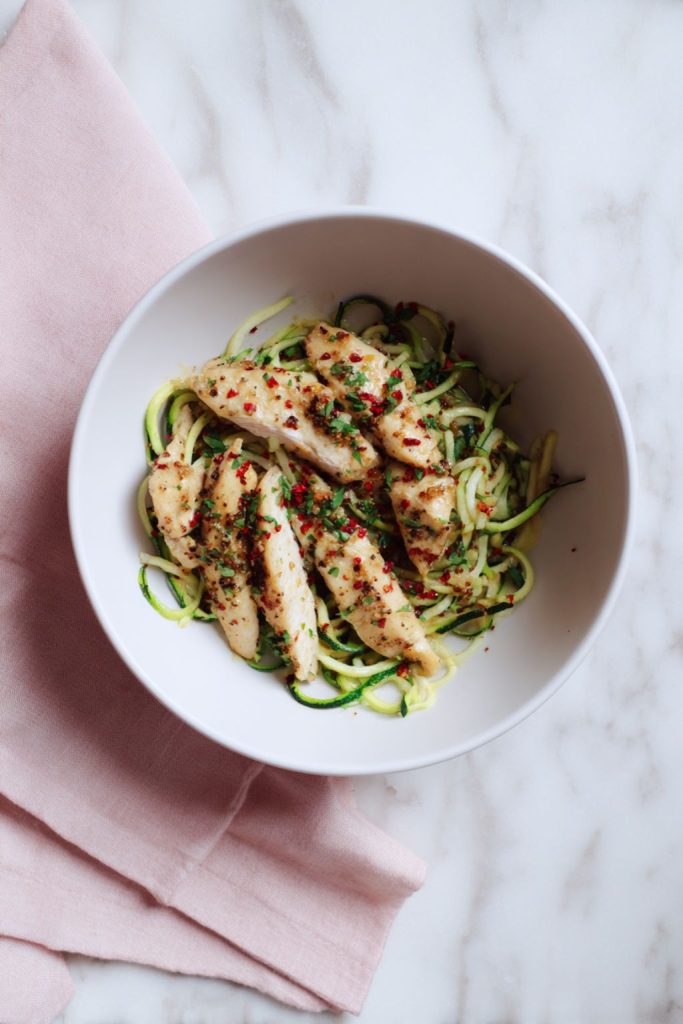
This is that “I want comfort but keep it light” lunch. Juicy chicken, a silky garlic-butter pan sauce and twirly zucchini noodles that soak it all up. It tastes restaurant-level, but it’s weeknight-easy, the kind of meal you pack on Monday and still smile about on Thursday (been there, reheated that).
Serves: 4
Ingredients:
- 1½ lbs chicken breasts, thinly sliced or pounded
- 1 tbsp olive oil
- 3 tbsp unsalted butter, divided
- 4 cloves garlic, minced
- ¼ tsp red pepper flakes (optional, for a gentle kick)
- Juice of ½ lemon
- 4 medium zucchini, spiralized (about 6–7 cups)
- ¼ cup grated Parmesan (optional, but amazing)
- Salt & black pepper, to taste
- Fresh parsley, chopped, for garnish
Instructions:
- Pat the chicken dry and season with salt and pepper. Heat olive oil and 1 tbsp butter in a large skillet over medium-high heat. Cook the chicken for 3–4 minutes per side, until golden and cooked through. Transfer to a plate.
- Lower the heat to medium. Add the remaining 2 tbsp butter, garlic, and red pepper flakes. Stir for about 30 seconds until fragrant. Add lemon juice and scrape up the browned bits from the pan.
- Add the zucchini noodles and toss for 1–2 minutes, just until lightly softened, don’t overcook or they’ll get watery.
- Return the chicken to the skillet and toss to coat in the sauce. Remove from heat, sprinkle with Parmesan and parsley, and adjust seasoning to taste.
- Divide into containers and spoon a little extra sauce on top for the best flavor when reheating.
Storage Tip:
Refrigerate for up to 4 days. For the best texture, reheat gently for 60–90 seconds so the zoodles stay tender-crisp. If any moisture collects, a quick toss in a hot dry skillet fixes it. Add a lemon wedge in your lunchbox for a fresh squeeze before eating, tiny detail, BIG payoff.
2. Greek Chicken Salad Jars with Tzatziki Dressing
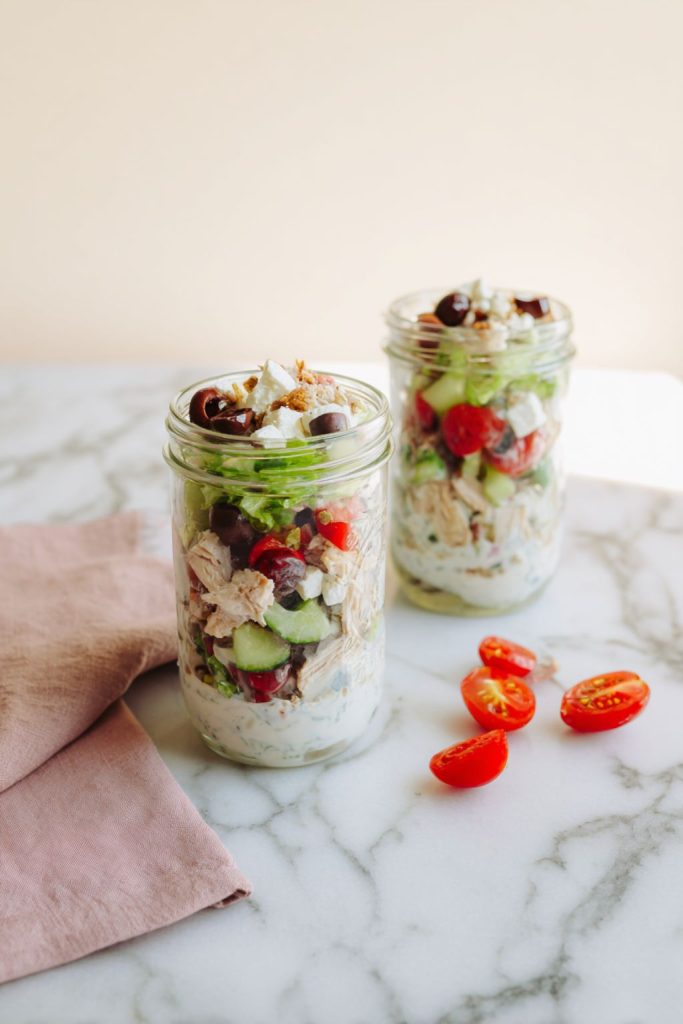
If you like lunches that look as good as they taste, these salad jars are it. Layers of colorful veggies, juicy chicken, tangy feta, and that creamy tzatziki dressing at the bottom, it’s everything you love about a Greek salad, packed neatly and ready to grab from the fridge.
They stay crisp and fresh for days and all you have to do at lunchtime is shake, pour, and dig in. It’s low-carb, high-flavor, and feels a little fancy even on a busy Tuesday.
Serves: 4
Ingredients:
- 1 lb cooked chicken breast, diced
- 1 cup cherry tomatoes, halved
- 1 cucumber, chopped
- ½ cup Kalamata olives, sliced
- ½ cup crumbled feta cheese
- 2 cups chopped romaine lettuce
- ½ cup tzatziki sauce
- 1 tbsp olive oil
- Salt & pepper, to taste
Instructions:
- Start with clean, wide-mouth jars or airtight meal prep containers.
- Spoon about 2 tbsp tzatziki sauce into the bottom of each jar.
- Add diced chicken, then layer in tomatoes, cucumber, olives, and feta.
- Top with romaine lettuce and a light drizzle of olive oil.
- Seal the jars tightly and refrigerate until ready to serve.
- When it’s lunchtime, just shake the jar to mix everything up or pour it out into a bowl.
Storage Tip:
Keeps well in the fridge for up to 4 days. To keep everything crisp, make sure the dressing stays at the bottom and lettuce at the very top. If you’re prepping these ahead for the week, save a little extra tzatziki in a small container for a fresh drizzle before serving.
3. Low-Carb Burrito Bowls with Cauliflower Rice
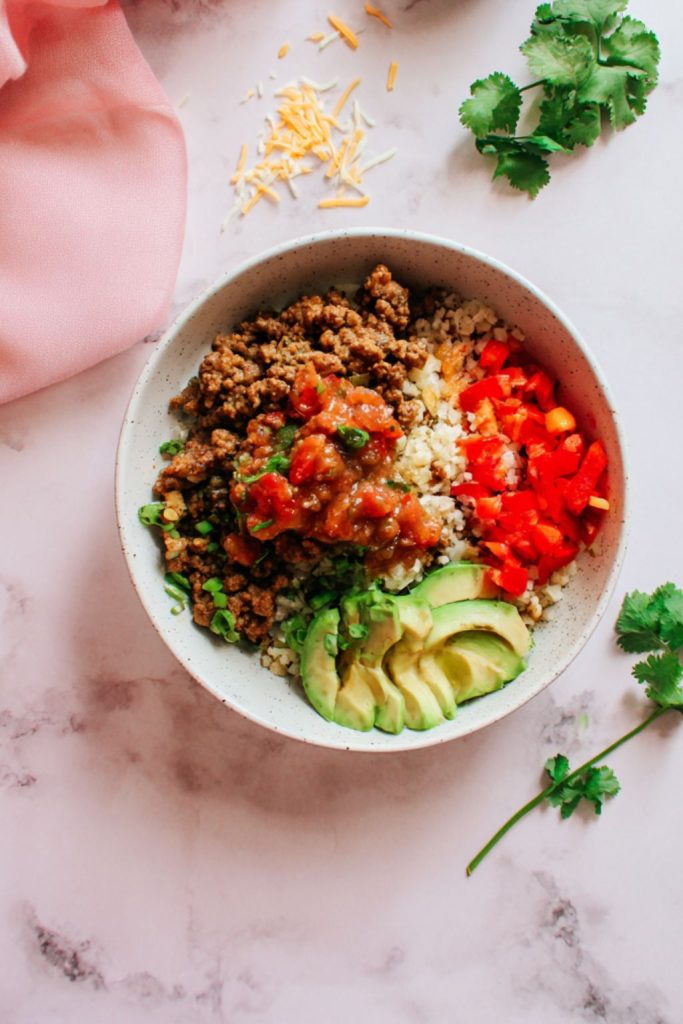
You know those meals that just hit the spot every time? This is ONE of them. It’s got all the bold, Tex-Mex flavors you love (smoky, a little spicy, totally satisfying) but without the heavy wrap or extra carbs.
These burrito bowls are easy to prep, super filling, and way better than anything you’d grab from a drive-thru. We make a big batch on Sunday and pile on whatever toppings we’ve got… salsa, avocado, cheese, it all works!
Serves: 4
Ingredients:
- 1 lb ground turkey or lean ground beef
- 1 tbsp olive oil
- 2 cups cauliflower rice (fresh or frozen)
- 1 bell pepper, sliced
- 1 small onion, sliced
- 1 tsp chili powder
- ½ tsp cumin
- ½ tsp smoked paprika
- Salt & pepper, to taste
- Optional toppings: diced avocado, salsa, shredded cheese, chopped cilantro, lime wedges
Instructions:
- Heat olive oil in a large skillet over medium-high heat. Add ground turkey and cook until browned, breaking it up as it cooks.
- Sprinkle in chili powder, cumin, smoked paprika, salt, and pepper. Stir until everything’s coated and smells amazing.
- In another pan, sauté the bell pepper and onion for 3–4 minutes, just until they soften and get a little color.
- Add cauliflower rice to the pan with the veggies and cook for another 3–4 minutes, stirring often. Season lightly with salt and pepper.
- Divide the cauliflower rice mixture into meal prep bowls, then top with the seasoned turkey. Add your favorite toppings right before eating or pack them on the side if you’re prepping for the week.
Storage Tip:
These bowls stay fresh for up to 4 days in the fridge. Reheat the meat and cauliflower base first, then add your cold toppings. If you like things saucy (same here!), a spoonful of salsa or a drizzle of hot sauce brings everything back to life.
4. Spicy Shrimp & Veggie Stir-Fry Boxes

This one’s quick, colorful, and a total flavor bomb. Juicy shrimp, crisp veggies, and a garlicky chili sauce that’s just the right kind of spicy, not “call the fire department” hot, BUT enough to wake up your taste buds!
It’s one of those lunches that looks fancy but takes less than 20 minutes to make (honestly, the shrimp cook faster than my coffee machine). Perfect for when you want something light but still super satisfying!
Serves: 4
Ingredients:
- 1 lb large shrimp, peeled and deveined
- 2 tbsp soy sauce (or coconut aminos)
- 1 tbsp sriracha or chili-garlic sauce (add more if you like it hot!)
- 2 cloves garlic, minced
- 1 tbsp olive oil or sesame oil
- 1 cup broccoli florets
- 1 red bell pepper, sliced
- 1 small zucchini, sliced
- 1 small carrot, thinly sliced
- Salt & pepper, to taste
- 1 green onion, chopped, for garnish
- Optional: sesame seeds, lime wedges
Instructions:
- Whisk together soy sauce, sriracha, and garlic in a small bowl.
- Heat oil in a large skillet or wok over medium-high heat. Add shrimp and cook for about 2 minutes per side, until pink and opaque. Remove and set aside.
- In the same pan, toss in the broccoli, bell pepper, zucchini, and carrot. Stir-fry for 4–5 minutes until the veggies are tender-crisp.
- Add the shrimp back to the pan along with the sauce mixture. Stir everything together until well coated and glossy.
- Taste and adjust the seasoning, a splash more soy or a squeeze of lime can make it sing! Divide into containers and sprinkle with green onions or sesame seeds.
Storage Tip:
Keeps well in the fridge for up to 3 days. Shrimp reheats fast, so warm it gently (like 45–60 seconds). If you’re taking it to work, it’s also great cold, kind of like a spicy shrimp salad with crunch!
5. Cheeseburger Salad with Pickle Dressing
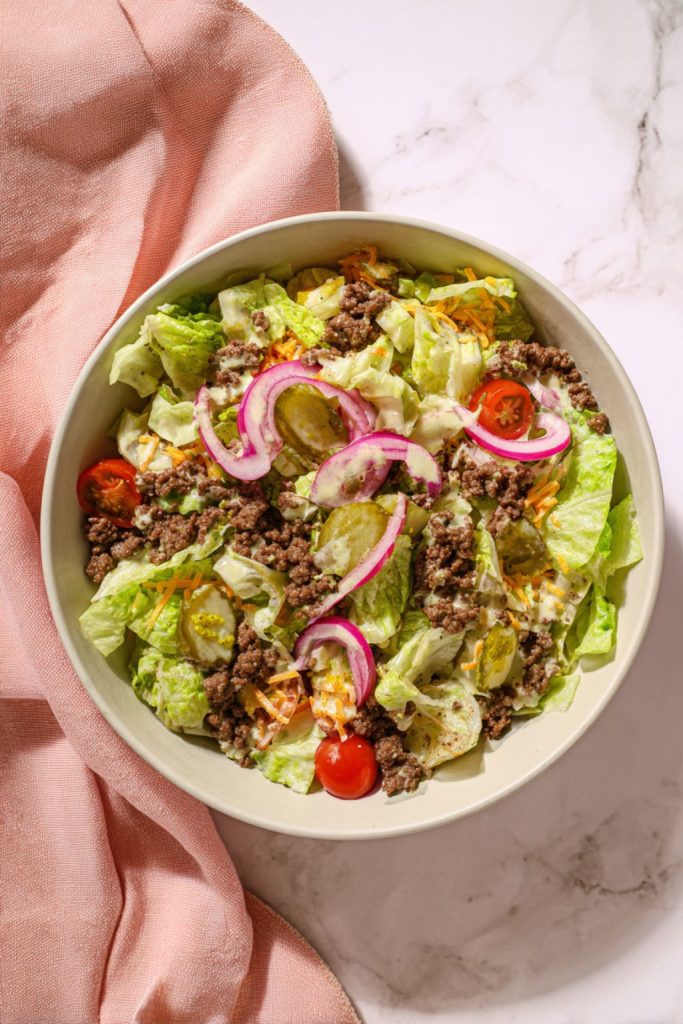
All the flavor of your favorite burger but just without the bun (and the post-lunch nap). This salad is crunchy, tangy, a little smoky, and honestly… it’s so GOOD you won’t miss the bread one bit.
The secret? That pickle dressing! It’s creamy, a little sharp, and ties everything together like the best fast-food sauce ever, but homemade and way lighter. I swear, every time I make this one, my husband “accidentally” eats two portions.
Serves: 4
Ingredients:
- 1 lb lean ground beef (or turkey)
- 1 tbsp olive oil
- 1 tsp garlic powder
- 1 tsp onion powder
- Salt & pepper, to taste
- 6 cups chopped romaine or iceberg lettuce
- 1 cup cherry tomatoes, halved
- ½ red onion, thinly sliced
- ½ cup shredded cheddar cheese
- 1 dill pickle, chopped (plus a few extra for topping)
Pickle Dressing:
- ½ cup Greek yogurt or light mayo
- 2 tbsp pickle juice
- 1 tsp yellow mustard
- 1 tsp ketchup (optional, for that “burger sauce” vibe)
- Salt & pepper, to taste
Instructions:
- Heat olive oil in a skillet over medium heat. Add ground beef, garlic powder, onion powder, salt, and pepper. Cook until browned and slightly crispy around the edges.
- Whisk together all the dressing ingredients in a small bowl. Adjust the flavor, more pickle juice for tang, or a tiny bit of ketchup if you like it sweeter.
- Divide lettuce, tomatoes, onion, cheese, and pickles into four containers.
- Spoon the cooked beef over the top (let it cool slightly first).
- Drizzle with pickle dressing when ready to eat or pack it on the side to keep things crisp.
Storage Tip:
Lasts up to 4 days in the fridge. Keep the dressing separate until serving to avoid soggy greens. For a fun twist, toss in a few crunchy onions or swap the beef for ground turkey, still hits all those “burger craving” notes!
6. Lemon Herb Salmon with Asparagus
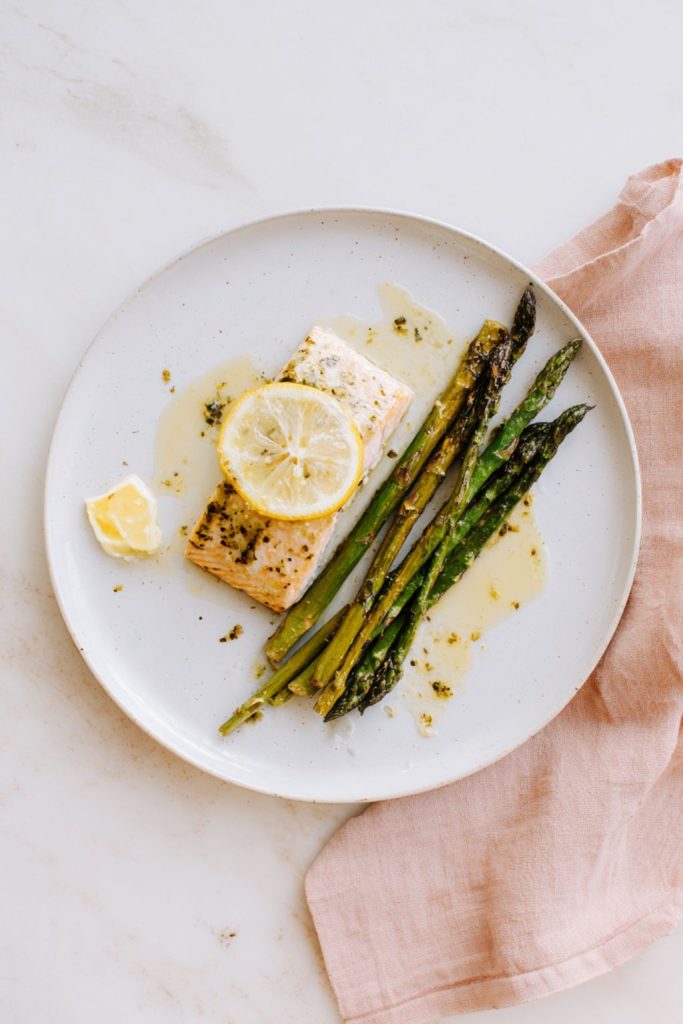
This one just feels fancy even though it’s literally one pan and 20 minutes. The salmon gets that buttery, flaky texture with a zesty lemon-herb flavor that tastes fresh every single time. And when it’s paired with roasted asparagus? Chef’s kiss.
It’s light, clean, and full of protein… perfect for those days when you want to eat something that feels healthy but still totally delicious. (Also, the smell while it’s baking? HEAVEN.)
Serves: 4
Ingredients:
- 4 salmon fillets (about 5 oz each)
- 1 bunch asparagus, trimmed
- 2 tbsp olive oil
- 2 tbsp butter, melted
- 2 cloves garlic, minced
- Juice and zest of 1 lemon
- 1 tsp dried dill (or fresh, if you’ve got it)
- Salt & black pepper, to taste
- Lemon slices, for topping
Instructions:
- Preheat the oven to 400°F (200°C) and line a baking sheet with parchment paper.
- Arrange salmon and asparagus side by side on the sheet.
- Whisk together olive oil, melted butter, garlic, lemon juice, zest, dill, salt, and pepper. Brush the mixture over everything, salmon and asparagus alike.
- Lay a lemon slice on top of each fillet.
- Roast for 12–15 minutes, until the salmon flakes easily with a fork and the asparagus is tender-crisp.
- Let it cool a bit before portioning into containers, a drizzle of extra pan juices on top makes it even better!
Storage Tip:
Keeps well in the fridge for up to 3 days. Reheat gently so the salmon stays moist (a quick zap or a covered pan on low heat works great). It’s also amazing cold, flaked over a salad with a squeeze of lemon and a sprinkle of sea salt.
7. Turkey Taco Lettuce Wrap Kits
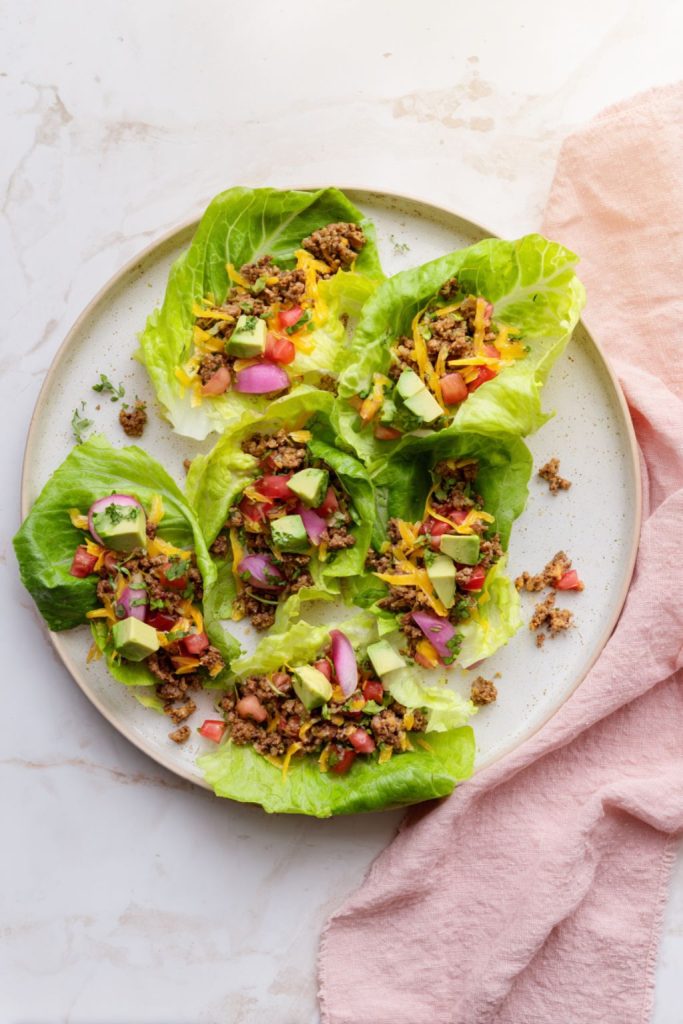
Okay, hear me out, these lettuce wraps are FUN. You get all that taco flavor, the spiced turkey, melty cheese, creamy sauce, but it’s fresh, light, and totally guilt-free. It’s like taco night got a little makeover (and honestly… we’re here for it).
They’re perfect for meal prep because you can pack everything separately, the filling, the toppings, and the lettuce, and just build your own wraps when it’s time to eat. No soggy leaves, no sad lunches, just messy, tasty taco happiness.
Serves: 4
Ingredients:
- 1 lb ground turkey
- 1 tbsp olive oil
- 2 cloves garlic, minced
- 1 tsp chili powder
- ½ tsp cumin
- ½ tsp smoked paprika
- Salt & pepper, to taste
- 1 head butter lettuce or romaine leaves, separated
- ½ cup shredded cheese (cheddar or Mexican blend)
- 1 small tomato, diced
- ¼ red onion, finely chopped
- 1 avocado, sliced
- Optional: Greek yogurt or sour cream, salsa, lime wedges
Instructions:
- Heat olive oil in a skillet over medium heat. Add turkey and cook until browned, breaking it apart as it cooks.
- Stir in garlic, chili powder, cumin, smoked paprika, salt, and pepper. Let it cook for another 2–3 minutes until it’s all coated in that smoky spice mix.
- Let the filling cool slightly, then divide it into meal prep containers.
- Pack lettuce leaves separately so they stay crisp.
- When it’s lunchtime, just pile the turkey into a lettuce cup, add toppings, squeeze a little lime, and wrap it up taco-style.
Storage Tip:
Keeps fresh for up to 4 days in the fridge. Store the lettuce and toppings separately for the best texture. If you want to switch it up, try the same filling in low-carb tortillas or over cauliflower rice, it’s just as good (maybe even better)!
8. Cauliflower Fried “Rice” Meal Prep Bowls
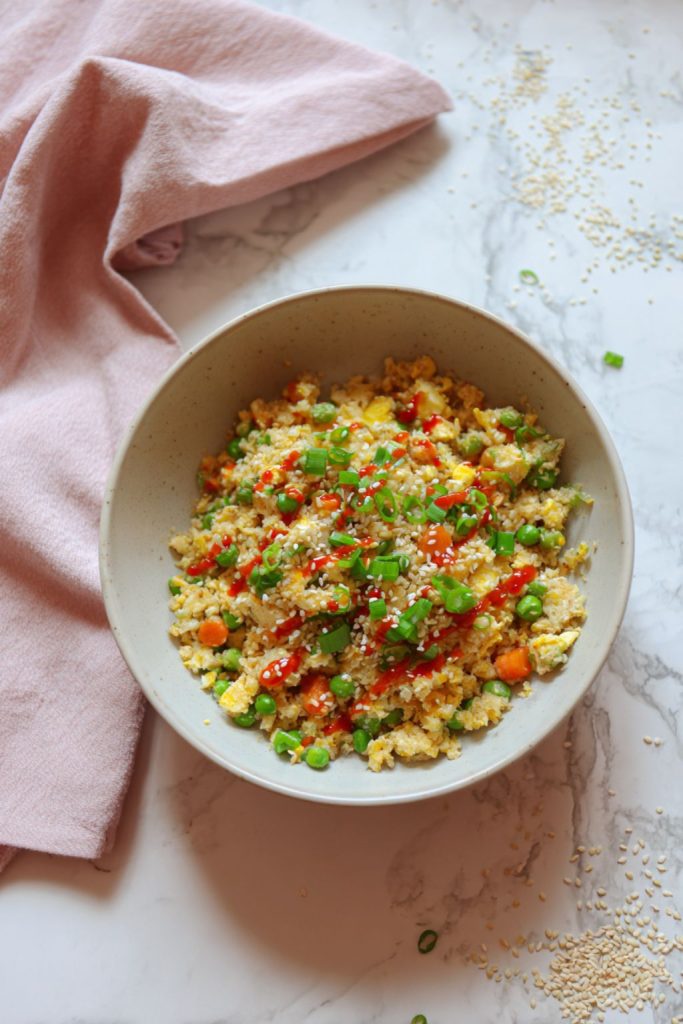
This is one of those sneaky recipes, it tastes like takeout fried rice but it’s secretly loaded with veggies and way lighter. The cauliflower rice soaks up all that garlicky, sesame goodness, and with the scrambled egg and bits of tender veggies… it’s just SO satisfying!
We make this one all the time when we’re craving comfort food but still want to feel good after eating. Plus, it’s fast, like, weeknight-fast! You’ll have the whole thing done before the actual takeout would’ve even arrived!
Serves: 4
Ingredients:
- 4 cups cauliflower rice (fresh or frozen)
- 1 tbsp sesame oil (or olive oil)
- 2 cloves garlic, minced
- 1 cup mixed veggies (peas, carrots, bell pepper, or whatever’s in your fridge)
- 2 eggs, lightly beaten
- 2 tbsp soy sauce (or coconut aminos)
- 1 tsp rice vinegar
- ½ tsp ground ginger
- Salt & pepper, to taste
- Optional: chopped green onions, sesame seeds, or a drizzle of sriracha
Instructions:
- Heat sesame oil in a large skillet over medium heat. Add garlic and cook for 30 seconds until fragrant.
- Toss in the veggies and cook for about 4–5 minutes, until they start to soften.
- Push the veggies to one side and pour the eggs into the empty space. Scramble them gently, then mix everything together.
- Add the cauliflower rice, soy sauce, vinegar, ginger, salt, and pepper. Stir often for 5–6 minutes, until everything’s hot and lightly golden.
- Taste and adjust seasoning. Divide into containers, sprinkle with green onions or sesame seeds, and add a tiny drizzle of sriracha if you like a kick!
Storage Tip:
Lasts up to 4 days in the fridge. It reheats beautifully, just give it a quick stir halfway through microwaving so it warms evenly. You can even toss it in a skillet for that “fresh off the wok” vibe… no one will know it’s meal prep.
9. Buffalo Chicken Meal Prep Boxes
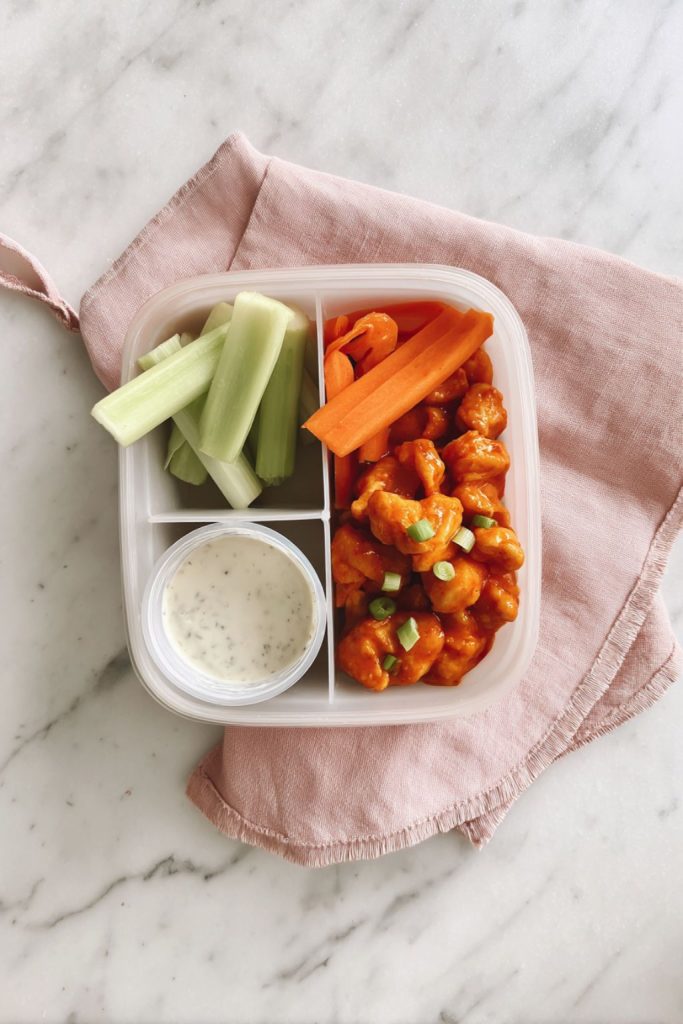
If you love that spicy, tangy kick of Buffalo sauce (same here!), this one’s about to be your new favorite lunch. Juicy chicken tossed in buttery hot sauce, paired with cool veggies and a creamy dip, it hits ALL the cravings without going overboard.
It’s one of those meals that actually feels fun to eat, kind of like game-day food, just portioned and ready for your weekday grind. And don’t worry… it’s got plenty of flavor, no boring chicken here!
Serves: 4
Ingredients:
- 1½ lbs chicken breast, cut into bite-sized pieces
- 1 tbsp olive oil
- ¼ cup hot sauce (like Frank’s RedHot)
- 1 tbsp butter, melted
- ½ tsp garlic powder
- Salt & pepper, to taste
- 2 cups celery sticks
- 2 cups carrot sticks
- ½ cup ranch or blue cheese dressing (for dipping)
- Optional: chopped green onion or crumbled blue cheese for topping
Instructions:
- Heat olive oil in a large skillet over medium-high heat. Add chicken, season with salt, pepper, and garlic powder, and cook until browned and fully cooked, about 6–8 minutes.
- In a small bowl, whisk together hot sauce and melted butter. Pour over the cooked chicken and toss until everything’s coated and glossy.
- Divide the chicken into containers, adding carrot and celery sticks on the side.
- Pack the dressing separately in little cups, because soggy veggies are a no-go!
Storage Tip:
Keeps up to 4 days in the fridge. Reheat the chicken on its own, then add the cold veggies when serving. If you like things extra saucy (and honestly, who doesn’t?), drizzle a bit more hot sauce after reheating for that just-cooked flavor.
10. Zesty Pesto Chicken & Roasted Veggie Boxes
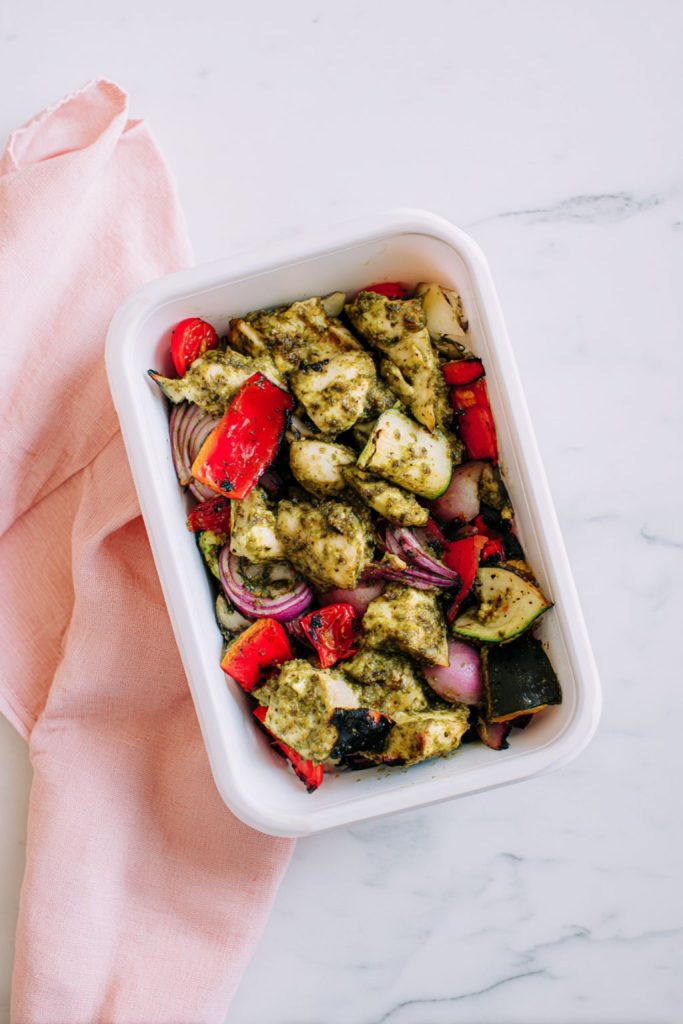
This one’s all about that fresh and herby vibe. Juicy chicken tossed in pesto, colorful roasted veggies, and just the right pop of lemon, it tastes like something from a cozy café lunch menu, but it’s way easier (and cheaper!) to make at home.
The best part? The pesto soaks into everything after a day or two in the fridge, making it even more flavorful. It’s one of those meal preps that actually gets BETTER as it sits… now that’s a win.
Serves: 4
Ingredients:
- 1½ lbs chicken breast, cut into cubes
- 2 tbsp olive oil, divided
- Salt & pepper, to taste
- 1 red bell pepper, chopped
- 1 small zucchini, sliced
- 1 cup cherry tomatoes, halved
- ½ small red onion, chopped
- ¼ cup pesto (store-bought or homemade)
- Juice of ½ lemon
- Optional: grated Parmesan and fresh basil for topping
Instructions:
- Preheat oven to 425°F (220°C) and line a sheet pan with parchment paper.
- Toss chicken with 1 tbsp olive oil, salt, and pepper. Spread on one half of the pan.
- On the other half, toss the veggies with the remaining olive oil, salt, and pepper.
- Roast for 18–20 minutes, stirring halfway through, until the chicken is cooked and veggies are golden and tender.
- Let everything cool slightly, then toss the chicken with pesto and lemon juice.
- Divide evenly into containers and top with a sprinkle of Parmesan or fresh basil if you’re feeling fancy.
Storage Tip:
Lasts up to 4 days in the fridge. Reheats perfectly, just warm it up and maybe add a tiny spoon of extra pesto before serving. It’s also great cold, almost like a bright, hearty salad… perfect for those busy days when you don’t even have time to microwave.
11. Egg Roll in a Bowl
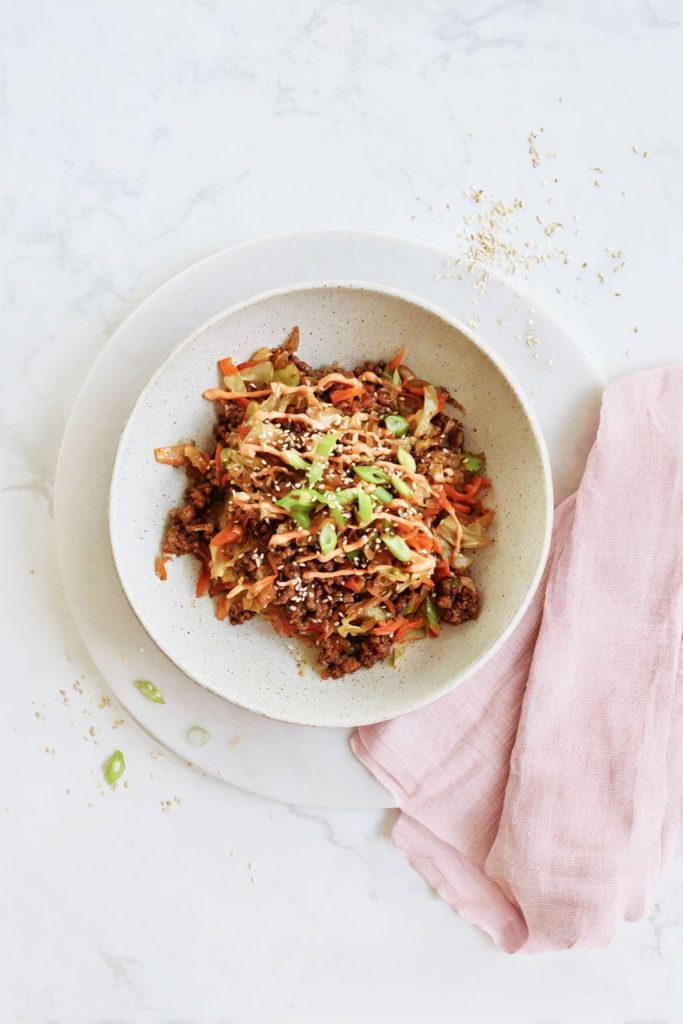
This one’s a total classic in the low-carb world and for good reason! You get all those cozy, takeout-style flavors (ginger, garlic, sesame… yum) but it’s quick, healthy, and doesn’t come in a greasy paper box.
It’s basically the inside of an egg roll, minus the wrapper, which means fewer carbs and way less fuss. My family LOVES this one… even my kid says it “tastes like noodles but it’s not noodles,” which is pretty much the best compliment ever.
Serves: 4
Ingredients:
- 1 lb ground pork or ground chicken
- 1 tbsp sesame oil
- 3 cloves garlic, minced
- 1 tbsp grated fresh ginger
- 1 small onion, diced
- 4 cups coleslaw mix (or shredded cabbage and carrots)
- 2 tbsp soy sauce (or coconut aminos)
- 1 tbsp rice vinegar
- 1 tsp sriracha or chili paste (optional, for heat)
- Salt & pepper, to taste
- Optional toppings: sliced green onions, sesame seeds, drizzle of spicy mayo
Instructions:
- Heat sesame oil in a large skillet over medium-high heat. Add the ground pork and cook until browned, breaking it apart with a spatula.
- Add garlic, ginger, and onion, and cook for another 2–3 minutes until fragrant.
- Stir in the coleslaw mix, soy sauce, rice vinegar, and sriracha. Cook for 4–5 minutes, tossing often, until the cabbage softens but still has a little crunch.
- Taste and season with extra soy sauce, salt, or pepper if needed.
- Divide into containers, then top with green onions or sesame seeds before serving.
Storage Tip:
Keeps great for up to 4 days in the fridge. Reheat in a skillet for the best texture (it gets a little crisp again!). It’s also amazing with a fried egg on top… just sayin’.
12. Low-Carb Chicken Caesar Lunch Bowls
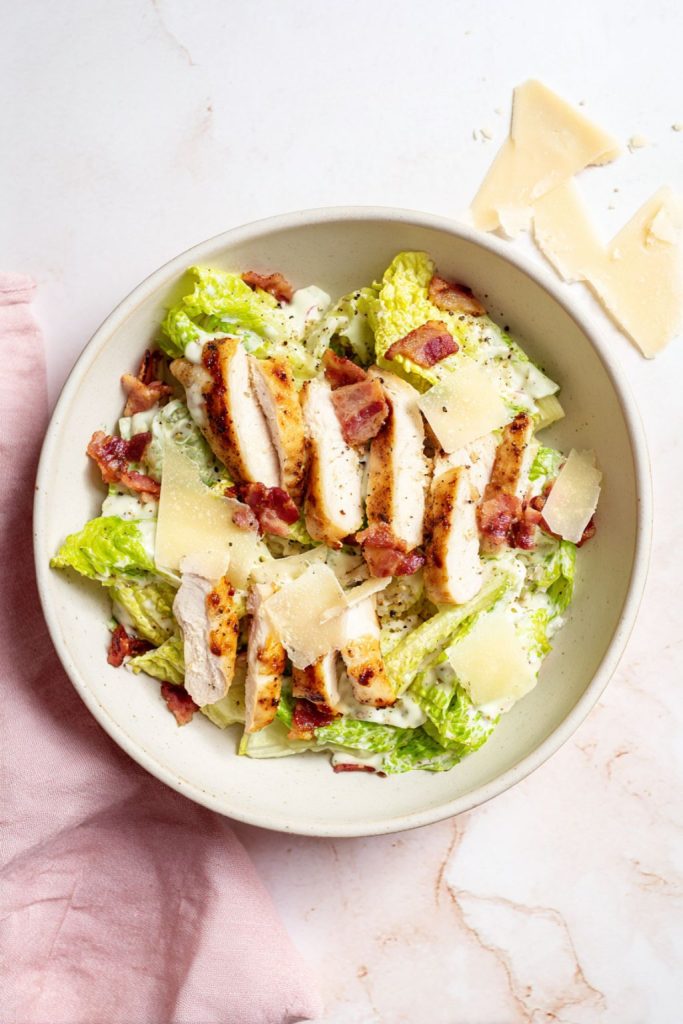
You really can’t go wrong with a good chicken Caesar, it’s one of those classic combos that never gets old. Crispy romaine, juicy chicken, salty Parmesan, and that creamy, garlicky dressing… it just works.
This version keeps it simple and low-carb but it still tastes rich and satisfying. I love making these bowls for grab-and-go lunches, they feel fresh even after a few days in the fridge and they’re way better than anything from the store deli.
Serves: 4
Ingredients:
- 1½ lbs grilled or baked chicken breast, sliced
- 6 cups chopped romaine lettuce
- ½ cup shaved or grated Parmesan cheese
- ½ cup Caesar dressing (use your favorite low-carb one or make it homemade)
- ¼ cup crispy bacon bits (optional but highly recommended)
- ½ lemon, cut into wedges
- Salt & black pepper, to taste
Instructions:
- If you’re cooking the chicken fresh, season it with salt, pepper, and a little olive oil, then grill or bake until golden and juicy. Let it cool before slicing.
- Divide the romaine into meal prep containers, then top with chicken, Parmesan, and bacon bits.
- Pack the dressing separately so your greens stay crisp.
- When it’s time to eat, drizzle with dressing, squeeze a bit of lemon, and toss it all together, that’s when the magic happens!
Storage Tip:
Keeps well in the fridge for 3–4 days. Store the lettuce and dressing apart for max crunch. If you like a little twist, swap the chicken for shrimp or turkey, or throw in a handful of cherry tomatoes for extra color and sweetness.
13. Creamy Tuscan Chicken Meal Prep Bowls
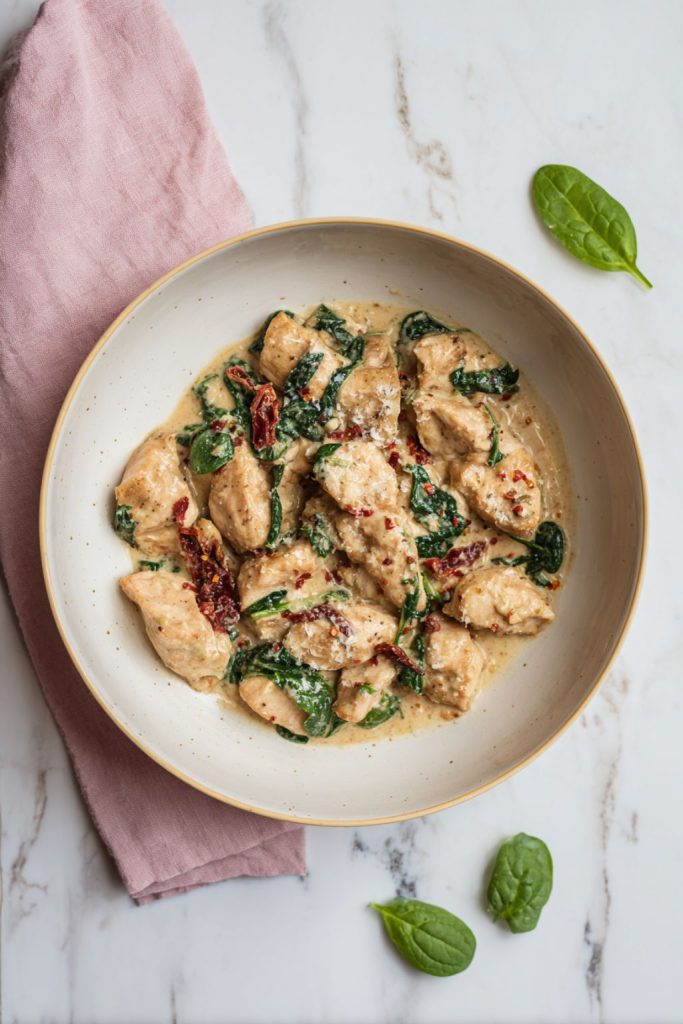
This one’s pure comfort in a container and full of that cozy “date-night dinner” flavor (but with zero effort). The sun-dried tomatoes give it that little punch of richness and the spinach makes it feel fresh and balanced.
It’s one of those dishes that somehow tastes even better the next day… all that sauce soaks right into the chicken and veggies. Serve it with roasted cauliflower, zucchini noodles, or just a fork, because you’ll wanna scoop up every bit!
Serves: 4
Ingredients:
- 1½ lbs chicken breast, thinly sliced or cubed
- 1 tbsp olive oil
- 2 cloves garlic, minced
- ½ cup sun-dried tomatoes, chopped (oil-packed, drained)
- 1½ cups baby spinach
- ½ cup chicken broth
- ½ cup light cream or coconut cream
- ¼ cup grated Parmesan cheese
- ½ tsp Italian seasoning
- Salt & pepper, to taste
- Optional: crushed red pepper flakes for a little kick
Instructions:
- Heat olive oil in a large skillet over medium heat. Add chicken, season with salt, pepper, and Italian seasoning, and cook until golden brown and cooked through. Remove from pan.
- In the same skillet, add garlic and sun-dried tomatoes. Cook for about 1 minute until fragrant.
- Pour in the chicken broth and cream, scraping up any browned bits from the pan. Let it simmer gently for 2–3 minutes until slightly thickened.
- Stir in the Parmesan and baby spinach, cooking until the spinach wilts and the sauce turns silky.
- Add the chicken back to the pan and toss everything together until coated.
- Divide into containers, spoon a little extra sauce over the top for good measure.
Storage Tip:
Keeps well in the fridge for up to 4 days. Reheat gently so the sauce stays creamy (if it thickens too much, add a splash of water or broth). It’s also amazing with a handful of steamed broccoli or cauliflower on the side, extra veggies, extra comfort.
14. Asian-Inspired Beef & Cabbage Stir-Fry
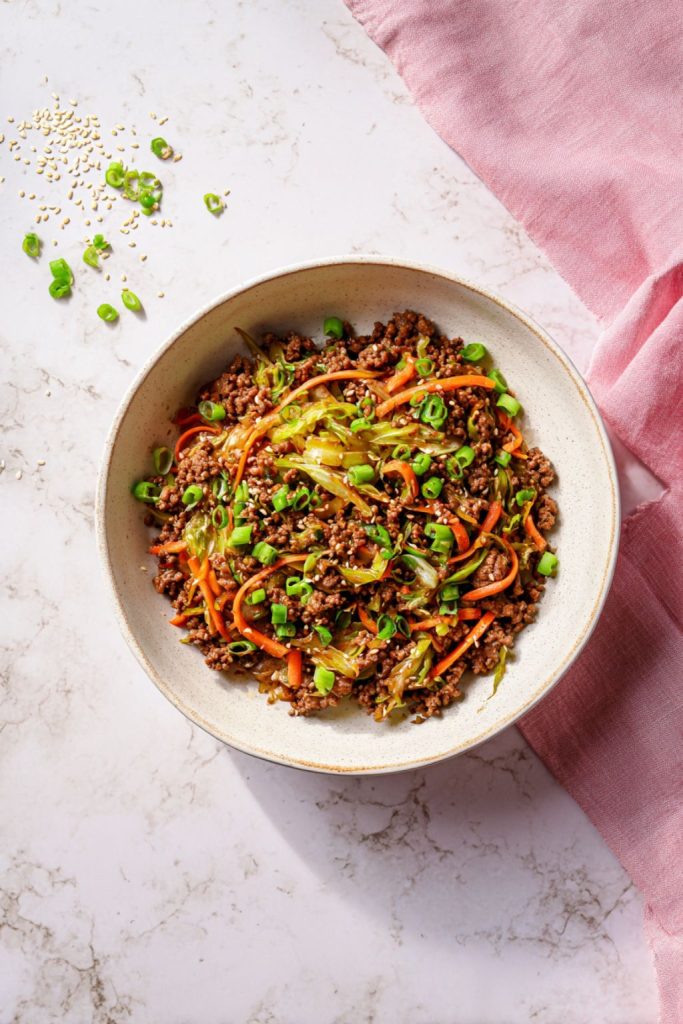
This one’s got that “weeknight lifesaver” energy, quick, one pan, and totally packed with flavor. Tender ground beef, crunchy cabbage, garlic, and soy sauce… it’s simple, satisfying, and tastes like takeout (but fresher and way cheaper).
It’s got a little bit of sweetness, a touch of spice, and that savory kick that makes you keep going back for just one more bite. Plus, it reheats beautifully, honestly, maybe even better the next day when all the flavors have had time to hang out.
Serves: 4
Ingredients:
- 1 lb lean ground beef (or ground turkey)
- 1 tbsp sesame oil (or olive oil)
- 3 cloves garlic, minced
- 1 tbsp grated fresh ginger
- 4 cups shredded green cabbage
- 1 carrot, grated or julienned
- 3 tbsp soy sauce (or coconut aminos)
- 1 tbsp rice vinegar
- 1 tsp chili-garlic sauce or sriracha (optional)
- 1 tsp honey or low-carb sweetener (just to balance the saltiness)
- Salt & pepper, to taste
- Optional toppings: chopped green onion, sesame seeds, squeeze of lime
Instructions:
- Heat sesame oil in a large skillet over medium-high heat. Add the beef and cook until browned, breaking it apart as it cooks.
- Add garlic and ginger, and cook another minute, your kitchen’s gonna smell SO good right about now.
- Stir in the cabbage and carrot. Toss for 4–5 minutes, until the veggies soften slightly but still have a little crunch.
- Add soy sauce, rice vinegar, chili-garlic sauce, and honey. Stir everything together and let it cook for another minute to soak up that sauce.
- Taste and adjust, more soy if you want it saltier, more vinegar for tang. Then pack it up and top with sesame seeds or green onions.
Storage Tip:
Stays fresh up to 4 days in the fridge. It reheats like a dream, just give it a quick stir in the skillet or microwave. Want to bulk it up a little? Add a fried egg on top… trust me, it’s a game-changer.
15. Avocado Egg Salad Lunch Boxes
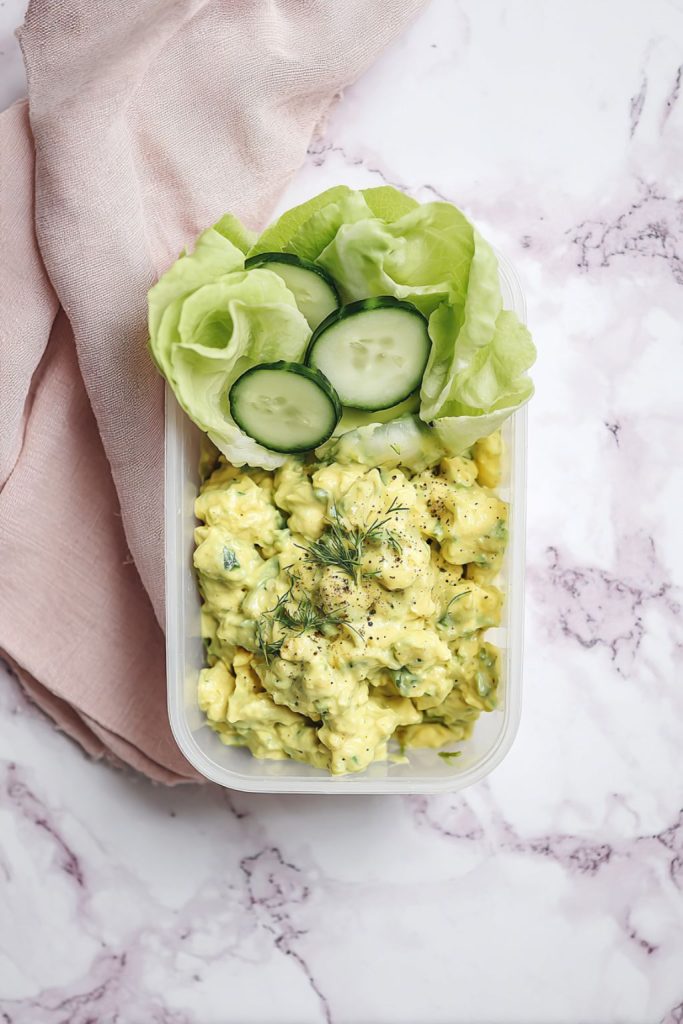
And here we are, the last recipe on the list! But honestly, this one might be my favorite because it’s just so EASY.
No stove, no fuss… just creamy, tangy, perfectly seasoned egg salad with that fresh avocado twist. It’s packed with protein, full of flavor, and feels like a little midday reset. Plus, it’s one of those lunches that actually gets better after a day, the lemon keeps everything bright and the texture stays creamy (not mushy, promise).
Serves: 4
Ingredients:
- 6 hard-boiled eggs, chopped
- 1 ripe avocado
- 2 tbsp Greek yogurt or light mayo
- 1 tsp Dijon mustard
- Juice of ½ lemon
- 1 tbsp chopped fresh dill (or parsley)
- Salt & pepper, to taste
- Optional add-ins: chopped celery, diced red onion, or a little hot sauce
For serving:
- Lettuce cups, cucumber slices, or low-carb crackers
Instructions:
- In a medium bowl, mash the avocado until mostly smooth.
- Add Greek yogurt, Dijon, lemon juice, dill, salt, and pepper. Stir until creamy and well combined.
- Gently fold in the chopped eggs until everything’s coated in that green, dreamy goodness.
- Taste and tweak, more lemon for brightness, a pinch more salt if you like it punchy.
- Divide into containers and pack with lettuce cups or veggie dippers on the side.
Storage Tip:
Best eaten within 3 days for peak freshness. If you’re prepping ahead, press a small piece of plastic wrap directly on top of the egg salad before sealing, it helps keep the avocado nice and green. It’s perfect for quick lunches, light dinners, or even breakfast on a busy morning.
So that’s the full lineup, 15 low-carb meal prep lunches that’ll actually make you look forward to eating lunch! I know how easy it is to fall into that midweek lunch slump (been there… usually with a half-eaten granola bar and coffee number three).
But when you’ve got meals like these waiting in the fridge, everything feels a little easier. A few minutes on Sunday, a fridge full of colorful boxes, and BOOM… you’re set up for success (and way fewer takeout temptations).
Here’s to lunches that make you excited to open the fridge… every single time!