If you’ve ever wished dessert could just magically appear when you need it… SAME. Between work, family, and trying to keep the house from falling apart, baking from scratch every time you crave something sweet just isn’t gonna happen.
That’s where freezer desserts totally save the day! You make them once, stash them away, and boom, instant dessert whenever you want it. No baking marathons, no sink full of dishes, and no “ugh, why is the oven still preheating?” moment.
When the holidays roll around, Thanksgiving, Christmas, birthday parties, everything at once, having dessert ready to go feels like a small miracle.
You just pull it out, add a little topping or drizzle, and everyone thinks you planned it that way (wink).
These are the kind of treats that make you look put-together but take almost no effort. From creamy cheesecake bites to peanut butter fudge and even cookie dough you can eat straight from the freezer (don’t act like you won’t), these 15 make-ahead desserts are sweet, simple, and here to make life taste a whole lot better!
Table of Contents
1. Chocolate Chip Cookie Dough Freezer Fudge
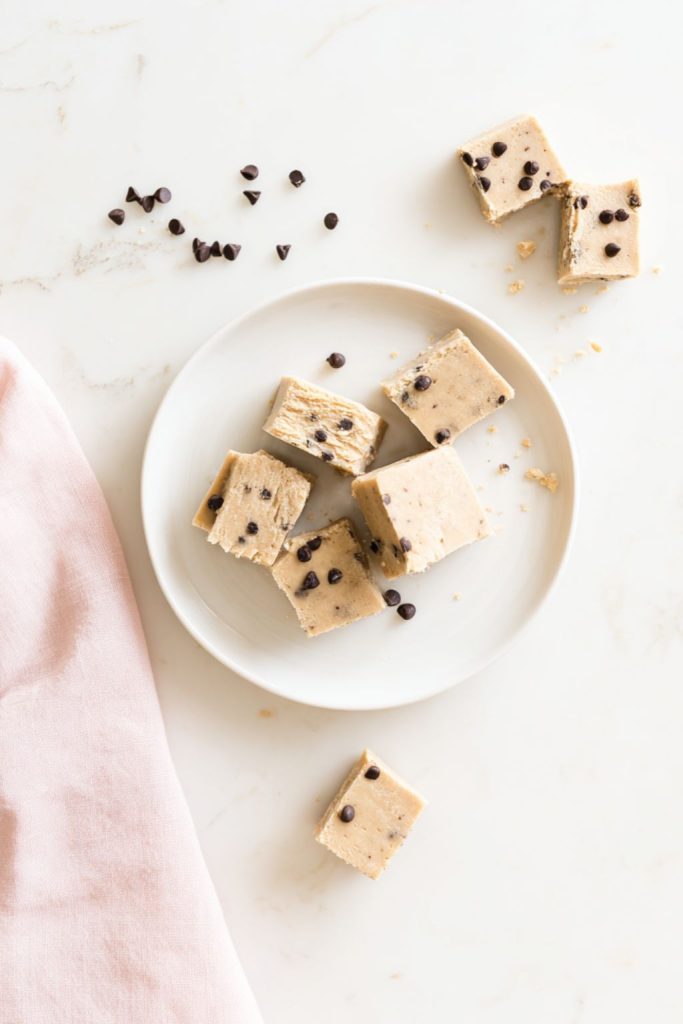
You know those nights when you want dessert now… but turning on the oven feels like a personal attack? SAME. This little guy is soft, chewy, and tastes like straight-up cookie dough, no eggs, no baking, no stress. Mix, press, freeze… snack! (Future-you is going to be VERY happy.)
Serves: 12 squares
Ingredients:
- 1 cup almond flour
- ½ cup natural peanut butter (or almond butter)
- ¼ cup maple syrup or honey
- 1 tsp vanilla extract
- ¼ cup mini chocolate chips
- Pinch of salt
Instructions:
- Line an 8×8-inch pan with parchment (leave little “handles” so it lifts right out, we love EASY).
- In a bowl, stir together almond flour, peanut butter, maple syrup, vanilla, and salt until smooth and doughy.
- Fold in the chocolate chips (try not to “taste test” half the bowl… I believe in you!).
- Press the mixture evenly into the pan and smooth the top.
- Freeze for at least 1 hour. Lift out, slice into small squares, and stash.
Freezer Tip:
Keeps up to 2 months in an airtight container. Let a square sit for 5 minutes before biting… or go for that frosty chew right away!
2. Creamy Greek Yogurt Key Lime Bars
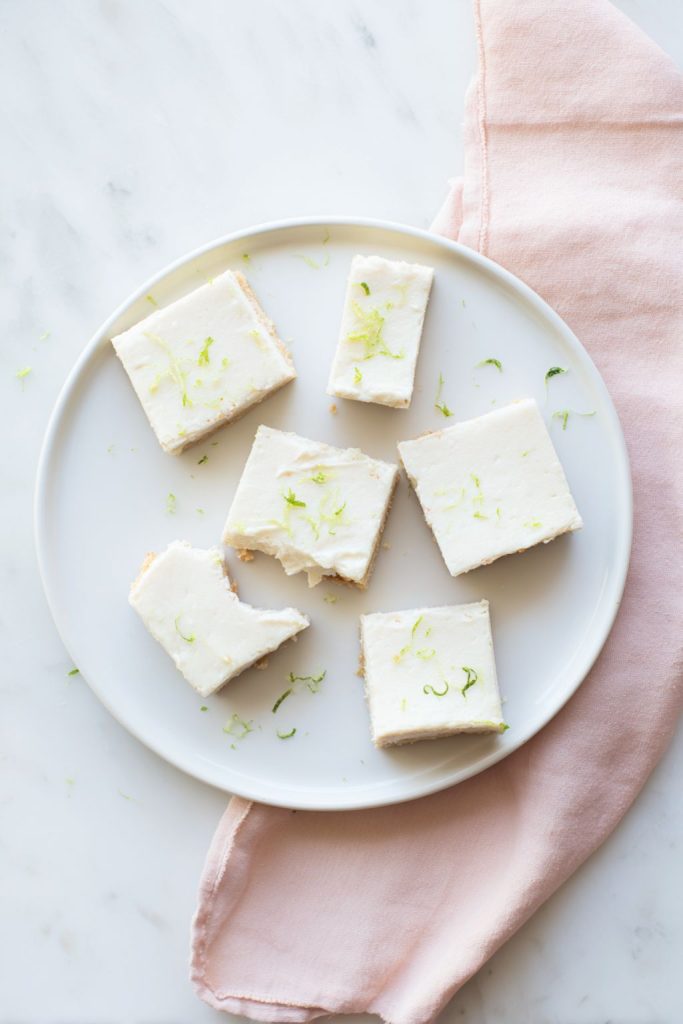
You know those days when you want something sweet, but not heavy… like a dessert that feels like a mini vacation? That’s this. These creamy, tangy bars are bright, refreshing, and just the right amount of sweet, kind of like key lime pie, but WAY easier and way less messy.
They’ve got that smooth, velvety filling on a crunchy graham base, and when you pull them from the freezer, they taste like pure sunshine. Seriously, one bite, and suddenly everything feels a little lighter (even Monday).
Serves: 9 bars
Ingredients:
For the crust:
- 1 cup crushed graham crackers (or oat biscuits)
- 2 tbsp melted butter
- 1 tbsp honey
For the filling:
- 1 cup plain Greek yogurt
- 4 oz cream cheese, softened
- 3 tbsp honey or maple syrup
- Juice and zest of 2 limes
- 1 tsp vanilla extract
Instructions:
- Line an 8×8-inch pan with parchment paper (makes cleanup basically disappear).
- In a small bowl, mix crushed crackers, melted butter, and honey. Press the mixture into the bottom of the pan to make your crust.
- In another bowl, whisk together yogurt, cream cheese, honey, lime juice, zest, and vanilla until smooth and creamy.
- Spread the filling evenly over the crust, smoothing the top.
- Freeze for 3–4 hours, or overnight if you’ve got the patience.
- Slice into bars, take a bite, and try not to eat them all at once.
Freezer Tip:
Store in an airtight container with parchment between layers. They’ll keep up to 2 months, but let’s be real, they’ll be gone way before that. Let them thaw for about 5 minutes before serving for that perfect creamy bite!
3. Frozen Peanut Butter Cup Clusters
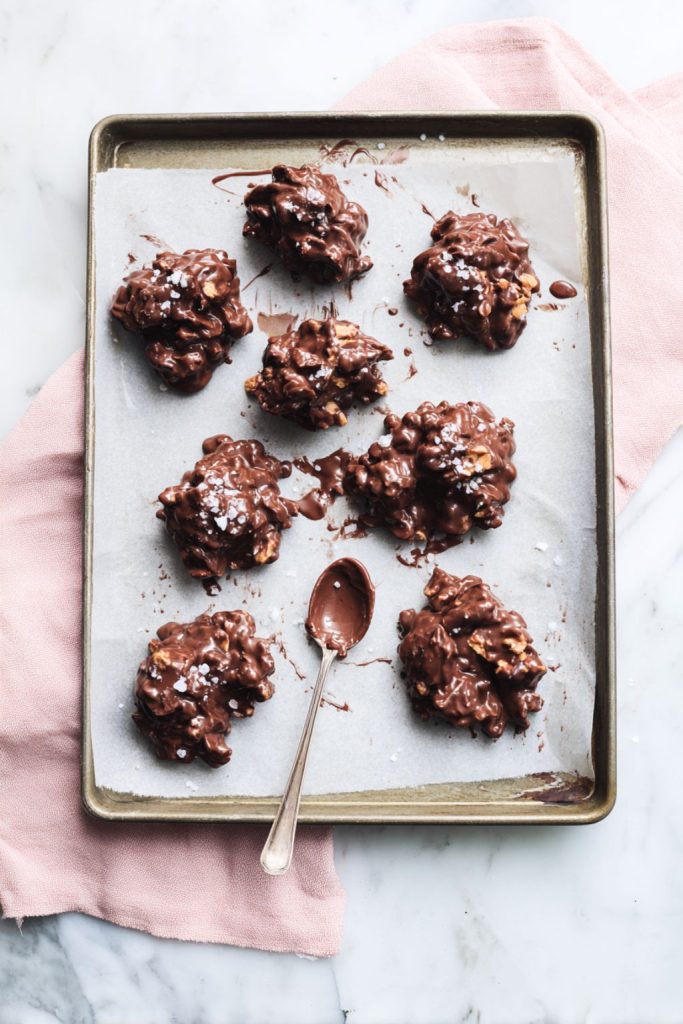
Okay, this one’s dangerously easy. Think peanut butter cups but lazier (and somehow even better). You just melt, mix, drop, and freeze. No molds, no mess, no waiting for layers to set. They’re crunchy, chocolatey, and just salty enough to keep you coming back for one more.
Honestly, these are the kind of treats you hide behind the frozen peas so no one else finds them. Perfect for a late-night snack, a movie treat, or when you just need something sweet RIGHT NOW.
Serves: 12 clusters
Ingredients:
- 1 cup dark chocolate chips
- ½ cup peanut butter (smooth or crunchy)
- ½ cup chopped peanuts or almonds
- 1 tbsp maple syrup (optional, for a little extra sweetness)
- Pinch of flaky sea salt
Instructions:
- Line a baking sheet with parchment paper.
- Melt the chocolate in the microwave (30-second bursts, stirring in between) until smooth.
- Stir in peanut butter, nuts, and maple syrup until everything’s glossy and coated.
- Drop spoonfuls of the mixture onto the parchment, messy is fine, we’re going for flavor, not perfection.
- Sprinkle a pinch of sea salt on top and freeze for 30–45 minutes, until firm.
Freezer Tip:
Store in an airtight container for up to 3 months. They taste amazing straight from the freezer, cold, crunchy, and melt-in-your-mouth good. Grab one when the craving hits… or two, because self-control is overrated!
4. No-Bake Brownie Energy Squares
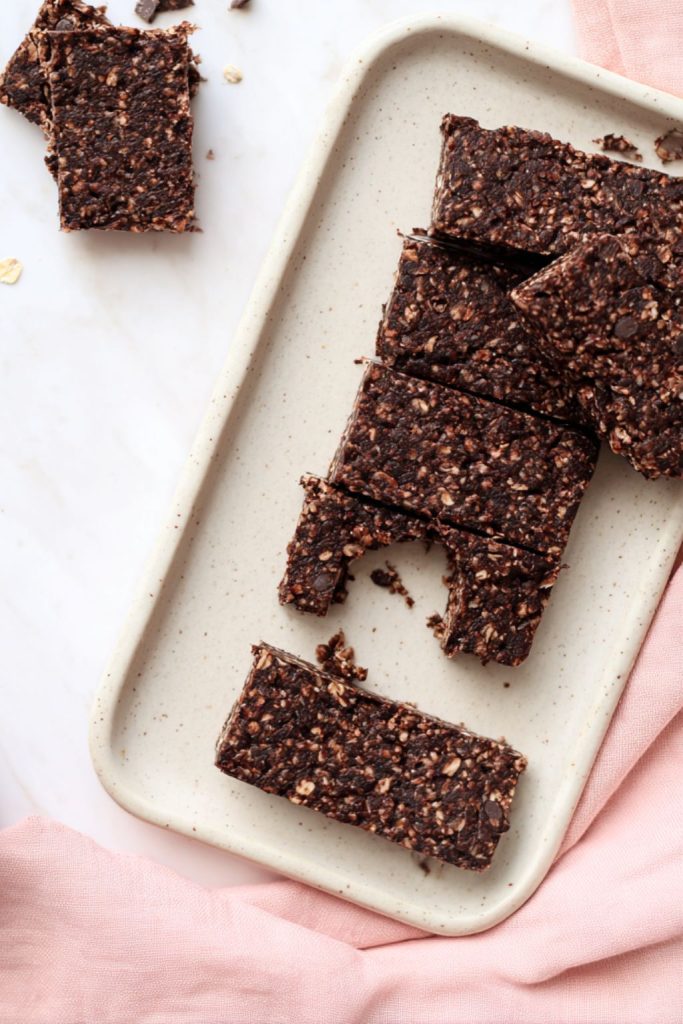
These little squares are pure chocolate therapy: rich, fudgy, and just the right amount of sweet. You only need a handful of ingredients and zero baking skills. They’re soft enough to bite straight from the freezer and totally satisfy that “I need chocolate right now” moment without all the sugar crash.
They’re also secretly packed with good stuff like oats and dates… so technically, these count as healthy-ish energy bites. (That’s what I tell myself when I grab one after dinner! Or before breakfast. Or… both.)
Serves: 12 squares
Ingredients:
- 1 cup pitted dates
- ½ cup rolled oats
- ¼ cup cocoa powder
- 2 tbsp peanut butter or almond butter
- 1 tbsp maple syrup
- 1 tsp vanilla extract
- Pinch of salt
- Optional: 2 tbsp mini chocolate chips or chopped nuts for crunch
Instructions:
- Add dates, oats, cocoa powder, nut butter, maple syrup, vanilla, and salt to a food processor.
- Blend until the mixture sticks together, it should look thick and brownie-like.
- Press into a parchment-lined loaf pan and sprinkle on any extras (because a little crunch never hurts).
- Freeze for 1 hour, then cut into squares.
Freezer Tip:
Keep them in an airtight container for up to 2 months. They taste best slightly chilled, just soft enough to bite but still fudgy and rich. Perfect for that mid-afternoon slump… or when you just need a “brownie break.”
5. Blueberry Cheesecake Freezer Bites
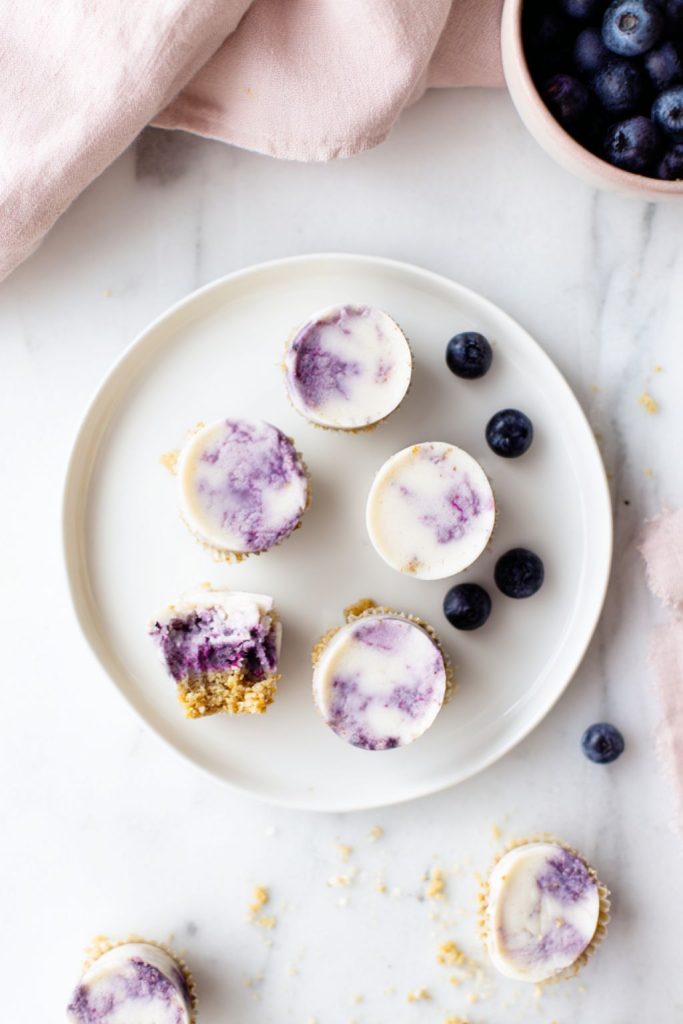
These little bites are like mini cheesecakes you can pop straight from the freezer. They’re the kind of treat that makes you feel fancy even when you’re eating one in your car (been there).
The best part?! No baking, no water bath, no cracking stress, just mix, spoon, and freeze. The combo of tangy yogurt, smooth cream cheese, and sweet blueberries hits every craving.
Serves: 12 bites
Ingredients:
For the crust:
- 1 cup crushed graham crackers or oat cookies
- 2 tbsp melted butter
- 1 tbsp honey
For the filling:
- ½ cup Greek yogurt
- 4 oz cream cheese, softened
- 3 tbsp honey or maple syrup
- 1 tsp vanilla extract
- ½ cup mashed blueberries (fresh or frozen, we’re chill here)
Instructions:
- Line a 12-cup mini muffin tin with paper liners.
- In a small bowl, mix crushed crackers, melted butter, and honey. Press a spoonful into the bottom of each cup.
- In another bowl, whisk together yogurt, cream cheese, honey, vanilla, and mashed blueberries until creamy and smooth.
- Spoon the filling over the crusts and smooth the tops.
- Freeze for 3–4 hours, or until set.
Freezer Tip:
Store in a sealed container for up to 2 months. Let them thaw for about 5 minutes before eating so they’re perfectly creamy. Bonus points if you top them with a tiny dollop of whipped cream, because why not?
6. Frozen Banana Bread Bites
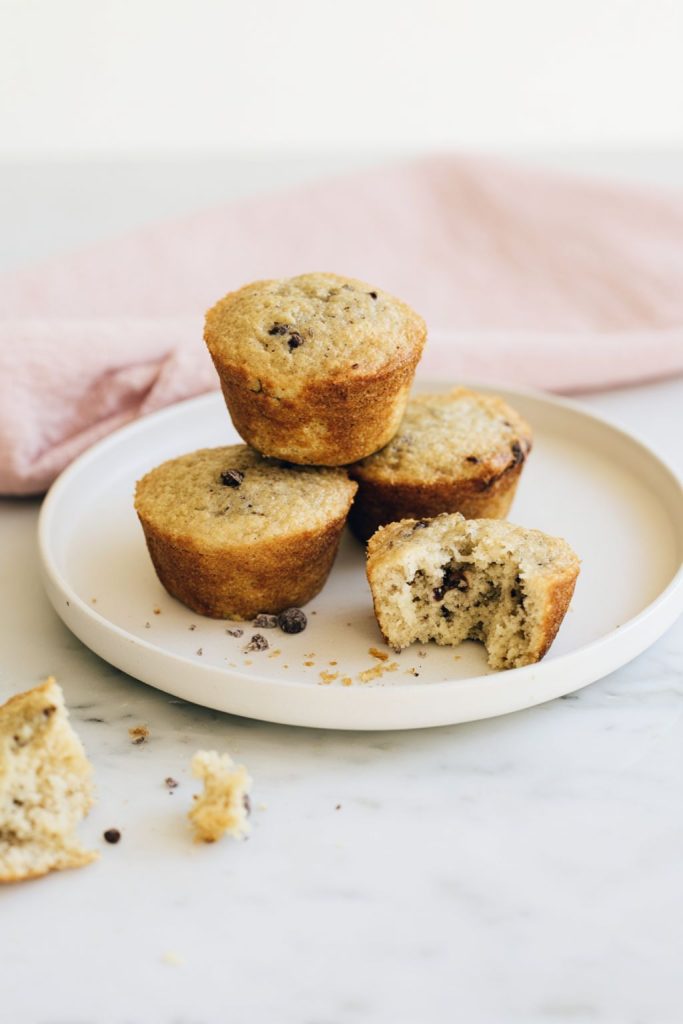
This one’s a game-changer, all the cozy flavor of banana bread, but in bite-size pieces you can grab straight from the freezer! They’re soft, slightly chewy, and perfect for those moments when you want something sweet but not full-on cake-level commitment.
They taste just like the real thing, banana, cinnamon, a little nutty… basically comfort in mini form. Make a batch, freeze them, and future-you will thank you every single time.
Serves: 16 bites
Ingredients:
- 2 ripe bananas, mashed
- 1 egg (or flax egg for vegan)
- 2 tbsp melted butter or coconut oil
- ¼ cup maple syrup or honey
- 1 cup oat flour (just blend rolled oats if you don’t have any)
- ½ tsp baking soda
- ½ tsp cinnamon
- Pinch of salt
- Optional: ¼ cup chopped walnuts or mini chocolate chips
Instructions:
- Preheat oven to 350°F (175°C) and line a mini muffin pan or small baking tray with parchment paper.
- In a bowl, whisk together mashed bananas, egg, butter, and maple syrup.
- Add oat flour, baking soda, cinnamon, and salt. Stir until just combined.
- Fold in any add-ins you love, nuts, chocolate chips, or both (go wild).
- Spoon the batter into the pan and bake for 12–14 minutes, until golden and springy.
- Let cool completely before transferring to a freezer-safe bag.
Freezer Tip:
Freeze for up to 2 months. Reheat in the microwave for 10–15 seconds for that warm, just-baked feel… or eat them cold right out of the freezer (they’re THAT good).
7. Chocolate-Covered Raspberry Yogurt Clusters
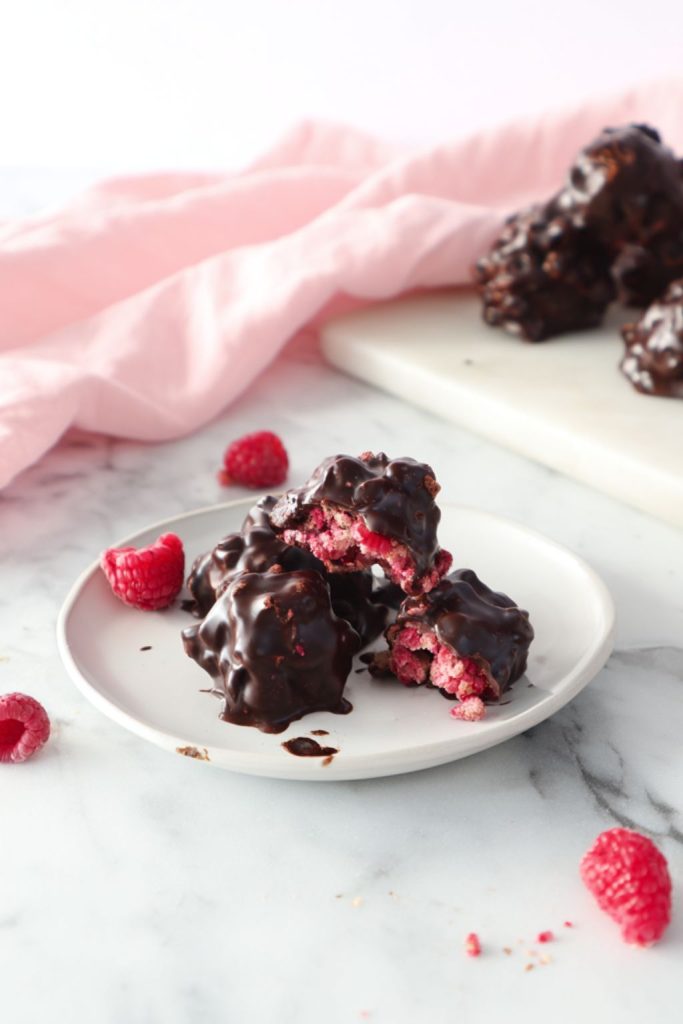
Sweet, tangy, creamy, and crunchy, basically everything you want in a bite. These little clusters look fancy but take about five minutes to throw together. You just mix, dip, and freeze. That’s it! They’re one of those desserts that taste like you tried way harder than you did (love that for us).
The yogurt gets all creamy and dreamy, the raspberries add that pop of tart, and the chocolate… well, it’s chocolate. Pure happiness!
Serves: 12 clusters
Ingredients:
- 1 cup fresh or frozen raspberries
- ½ cup Greek yogurt (plain or vanilla)
- 1 tbsp honey or maple syrup
- 1 cup dark chocolate chips
- 1 tsp coconut oil
Instructions:
- Line a baking sheet with parchment paper.
- In a bowl, mix raspberries, yogurt, and honey until coated, it’ll look a little messy, but trust the process.
- Drop spoonfuls of the mixture onto the parchment.
- Freeze for 1 hour, until solid.
- Melt the chocolate and coconut oil together (microwave or stovetop).
- Dip each frozen cluster into the melted chocolate, place back on the parchment, and freeze again until set.
Freezer Tip:
Store in an airtight container for up to 2 months. Eat them straight from the freezer for that perfect creamy-crunchy bite… or let them soften for a minute if you like things a little gooey. Warning: they disappear FAST.
8. Coconut-Mango Energy Bars
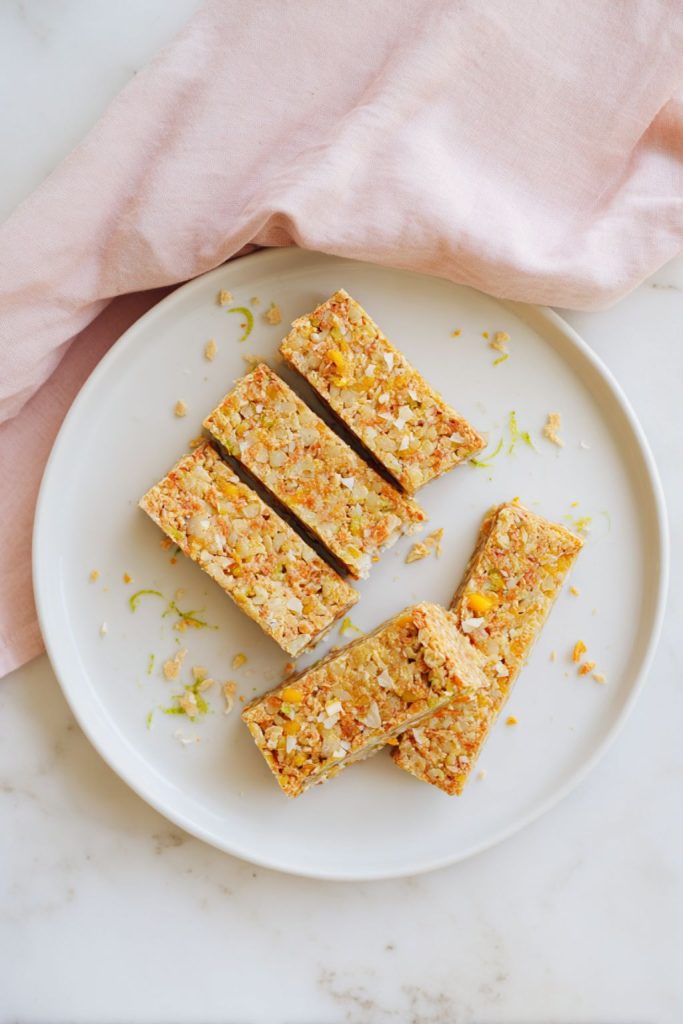
These bars are like a tropical vacation in snack form, full of sunshine-y flavor. You only need one bowl, no oven, and five minutes of effort (which is about all I’ve got most days)!
They freeze perfectly and taste like you’re sitting somewhere with palm trees… instead of at your kitchen counter surrounded by laundry. They’re naturally sweet from the mango, packed with coconut, and just a little tangy from lime. Basically, snack therapy that fits right in your freezer.
Serves: 10 bars
Ingredients:
- 1 cup dried mango, chopped
- 1 cup rolled oats
- ½ cup shredded coconut
- ¼ cup cashews or almonds
- 2 tbsp honey or maple syrup
- Juice and zest of 1 lime
- Pinch of salt
Instructions:
- Add dried mango to a small bowl and cover with hot water. Let soak for 5 minutes to soften, then drain.
- In a food processor, combine oats, coconut, cashews, honey, lime juice, zest, and salt. Blend until the mixture starts to stick together.
- Add the mango and pulse a few more times, leave a few chunks for that chewy bite.
- Press the mixture firmly into a parchment-lined loaf pan.
- Freeze for about 1 hour, then slice into bars.
Freezer Tip:
Store in an airtight container or freezer bag for up to 3 months. They taste amazing straight from the freezer, cold, chewy, and full of tropical flavor. Grab one whenever you need a little “vacation moment”… no plane ticket required!
9. Mini Frozen Tiramisu Cups

This one’s for all my coffee lovers who want dessert but don’t want to turn the kitchen into a disaster zone. These mini tiramisu cups have all that creamy, coffee-soaked goodness you love but without the fuss. No baking, no layering marathon… just mix, dip, freeze, and EAT!
They’re smooth, sweet, and a little rich, like a coffee shop treat hiding in your freezer. Perfect for when you want something cozy after dinner or a quick pick-me-up in the afternoon (because let’s be real, sometimes coffee alone just isn’t enough).
Serves: 6 cups
Ingredients:
- 6 ladyfinger cookies (or any crisp vanilla cookies)
- 1 cup strong brewed coffee (cooled)
- ½ cup mascarpone cheese
- ½ cup Greek yogurt
- 3 tbsp maple syrup or sugar
- 1 tsp vanilla extract
- 1 tbsp cocoa powder (for dusting)
Instructions:
- Break the ladyfingers in half and give them a quick dip in the coffee, just enough to soak up flavor, not fall apart.
- Arrange the pieces in the bottom of six small cups or jars.
- In a bowl, whisk together mascarpone, Greek yogurt, maple syrup, and vanilla until smooth and creamy.
- Spoon the mixture over the cookies and smooth out the tops.
- Dust with cocoa powder and freeze for at least 3 hours (overnight if you can wait that long).
Freezer Tip:
Store in the freezer, covered, for up to 2 months. Let them sit out for 10–15 minutes before eating so they’re soft and creamy again… and maybe add a little extra cocoa on top, because life’s better with chocolate!
10. Apple Cinnamon Oatmeal Cookie Sandwiches
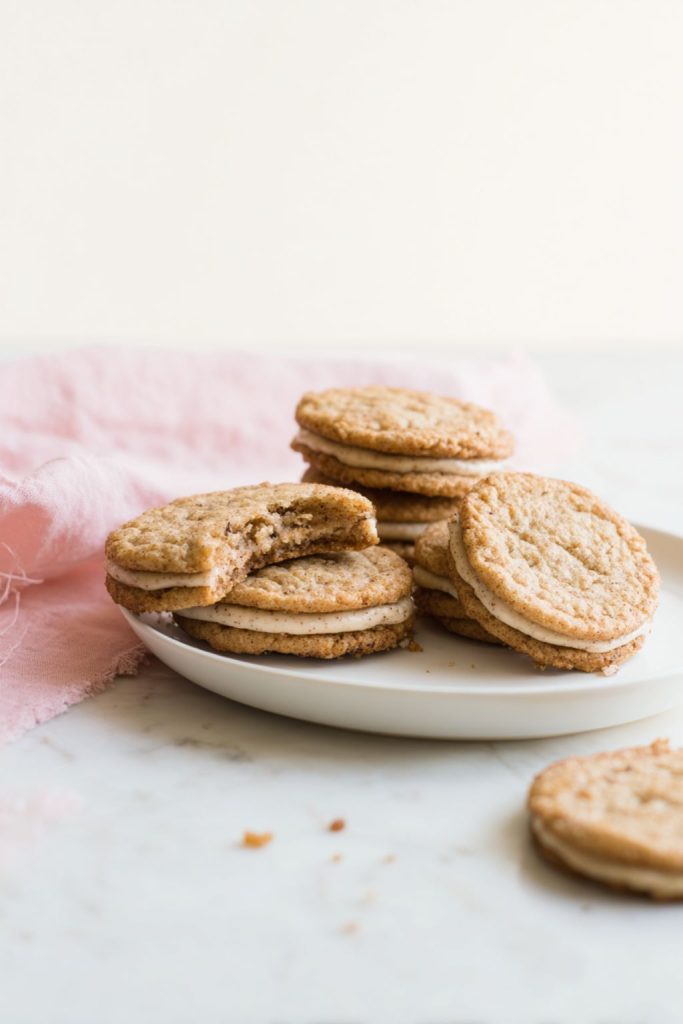
If fall had a freezer dessert this would be it. Soft oatmeal cookies, warm cinnamon flavor, and a creamy apple filling that tastes like pie in disguise. They’re chewy, sweet, and perfect for when you want something comforting but still easy enough to make during a busy week.
The best part?! You can freeze the whole sandwich and pull one out whenever you want a little cozy sweetness… they taste just as good cold as they do warmed up.
Serves: 8 sandwiches
Ingredients:
For the cookies:
- 1 cup rolled oats
- ¾ cup oat flour (or blend rolled oats until fine)
- ½ tsp baking soda
- ½ tsp cinnamon
- Pinch of salt
- ¼ cup melted butter or coconut oil
- ¼ cup maple syrup or honey
- 1 egg (or flax egg for vegan)
- 1 tsp vanilla extract
For the filling:
- 1 apple, peeled and finely chopped
- 1 tsp butter
- ½ tsp cinnamon
- 1 tsp brown sugar or maple syrup
Instructions:
- Preheat oven to 350°F (175°C) and line a baking sheet with parchment paper.
- In a large bowl, mix oats, oat flour, baking soda, cinnamon, and salt.
- Stir in melted butter, maple syrup, egg, and vanilla until everything comes together into a soft dough.
- Scoop tablespoon-sized portions onto the baking sheet and flatten slightly.
- Bake for 8–10 minutes, until golden around the edges. Let cool completely.
- Meanwhile, melt butter in a small pan, add chopped apple, cinnamon, and brown sugar. Cook for 5–7 minutes until soft and caramelized. Cool completely.
- Spoon a little apple filling between two cookies, press gently, and freeze for at least 1 hour.
Freezer Tip:
Store in an airtight container for up to 2 months. You can eat them straight from the freezer (they’re chewy and sweet!) or warm them for 10 seconds in the microwave for that fresh-baked cookie feel.
11. Chocolate-Hazelnut Banana Pops
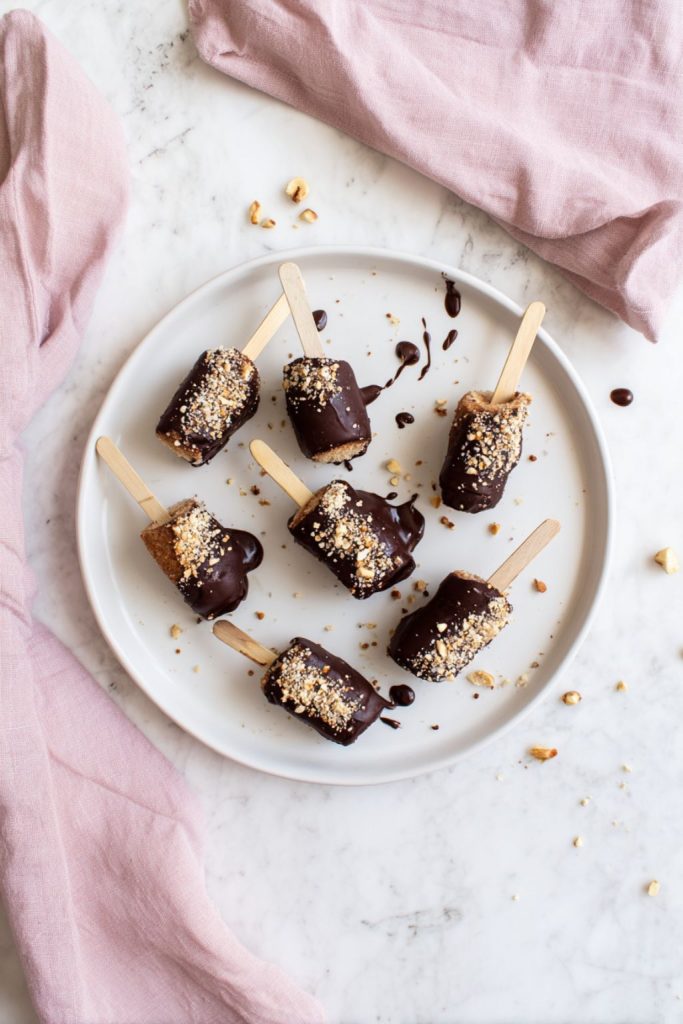
This one’s for the nights when you need dessert but can’t be bothered to bake.
Just slice, dip, and freeze, that’s it. These POPS are creamy, crunchy, chocolatey, and basically taste like a frozen candy bar (minus all the effort). They’re also a total hit with kids… and adults who act like kids when there’s chocolate involved. Keep a batch in the freezer for those “I just want something sweet” moments, you’ll be glad you did.
Serves: 10 pops
Ingredients:
- 3 ripe bananas, sliced into 1-inch chunks
- ½ cup chocolate-hazelnut spread (like Nutella)
- ½ cup dark chocolate chips
- 1 tsp coconut oil
- ¼ cup crushed hazelnuts (or almonds, peanuts, whatever’s hanging around)
- Popsicle sticks or toothpicks
Instructions:
- Line a baking sheet with parchment paper.
- Stick a popsicle stick or toothpick into each banana slice and place them on the sheet. Freeze for 30 minutes.
- Melt the chocolate chips and coconut oil together until smooth.
- Stir in the chocolate-hazelnut spread until glossy.
- Dip each banana piece into the mixture, then roll in crushed nuts if you’re feeling fancy.
- Place back on the parchment and freeze for another hour.
Freezer Tip:
Store in a sealed container for up to 2 months. They’re best eaten straight from the freezer, creamy in the middle, crunchy on the outside, and totally addictive. (Don’t say I didn’t warn you!)
12. Lemon-Coconut Snowballs
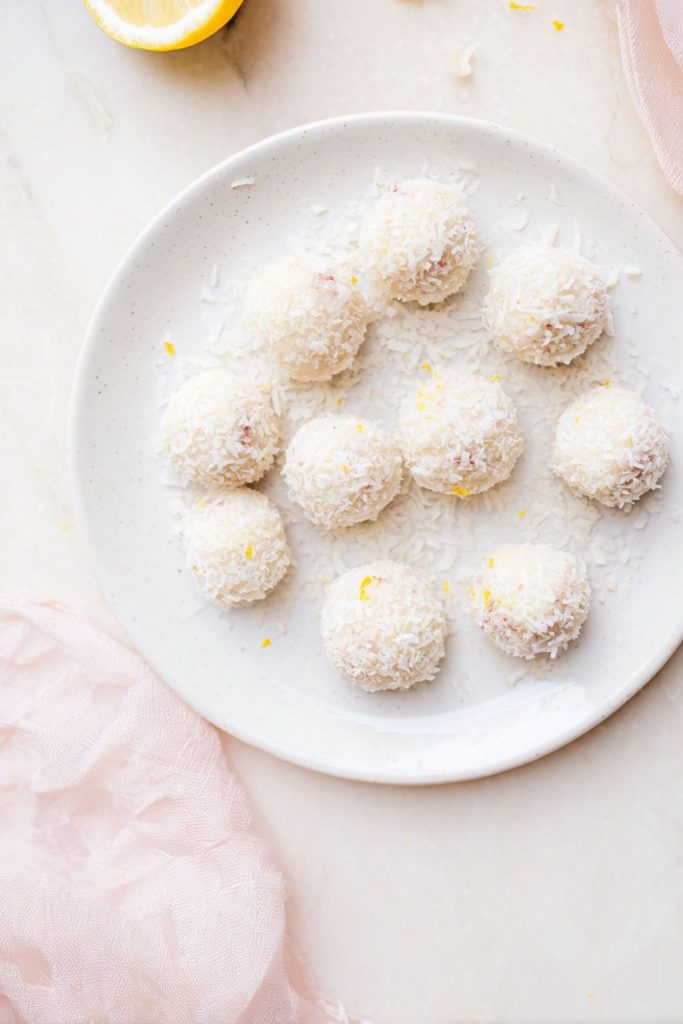
These little snowballs are soft, zesty, and full of that fresh lemon flavor that makes everything feel a bit brighter. They come together in minutes (no baking) and they freeze like a dream. They’re the perfect “just one more bite” treat after dinner… though, let’s be real, it’s never just one.
Serves: 14 snowballs
Ingredients:
- 1 cup shredded coconut (unsweetened or sweetened, your call)
- ½ cup almond flour
- 2 tbsp honey or maple syrup
- 2 tbsp coconut oil, melted
- Zest of 1 lemon
- Juice of ½ lemon
- Pinch of salt
Instructions:
- Add all ingredients to a bowl and stir until the mixture holds together, it should feel a little sticky but not wet.
- Roll into small balls, about 1 inch each, and place them on a parchment-lined tray.
- Freeze for 30–45 minutes, until firm.
- Optional: Roll again in shredded coconut for that snowy look.
Freezer Tip:
Keep them in a sealed container for up to 3 months. You can eat them straight from the freezer (they stay soft enough to bite!) or let them sit for a few minutes if you like them extra creamy. They’re bright, sweet, and just the right amount of lazy… my kind of dessert!
13. Frozen Mocha Yogurt Bark
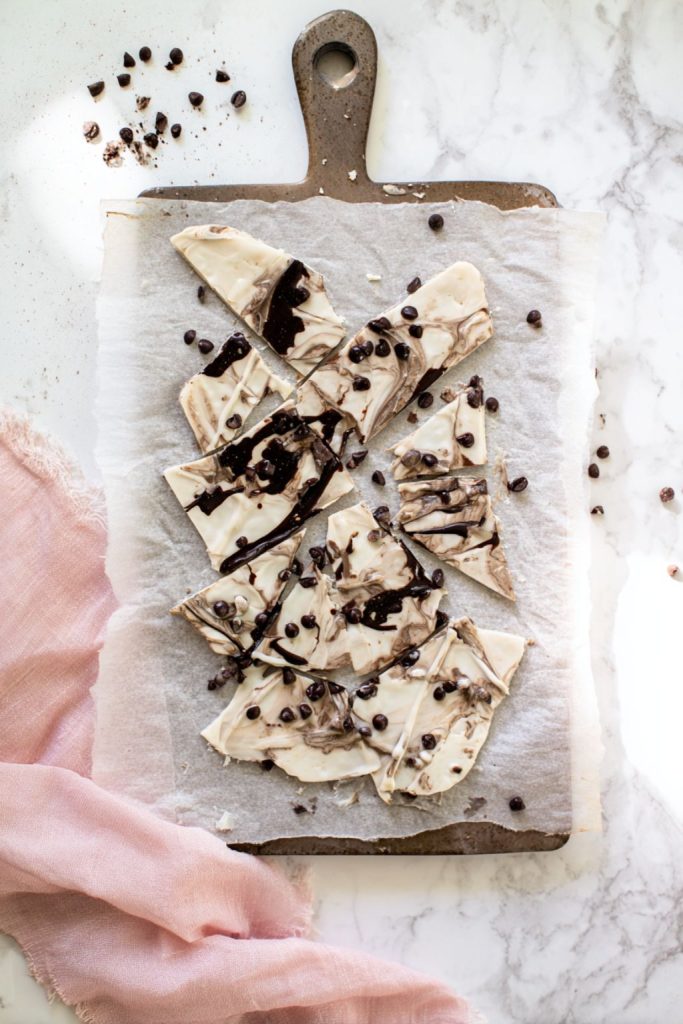
Coffee lovers, this one’s for you! It’s sweet, creamy, a little crunchy, and gives off that coffee-shop-treat vibe, minus the price tag or fancy equipment.
You just swirl, sprinkle, and freeze… that’s it! Perfect for an afternoon pick-me-up or when you want something cold and chocolatey after dinner. It’s kind of like eating a mocha frappuccino, only bite-sized and way easier to clean up after.
Serves: 12 pieces
Ingredients:
- 2 cups Greek yogurt (plain or vanilla)
- 2 tbsp instant coffee or espresso powder
- 2 tbsp honey or maple syrup
- 2 tbsp cocoa powder
- ¼ cup mini chocolate chips
- Optional toppings: crushed almonds, cacao nibs, or a drizzle of melted chocolate
Instructions:
- Line a baking sheet with parchment paper.
- In a bowl, whisk together yogurt, coffee powder, honey, and cocoa powder until smooth.
- Spread the mixture evenly over the parchment, about ¼ inch thick.
- Sprinkle chocolate chips (and any toppings) evenly over the top.
- Freeze for 2–3 hours, until solid.
- Break into pieces and try not to eat the whole tray at once.
Freezer Tip:
Store pieces in a freezer bag or container for up to 2 months. Grab one whenever you need something sweet, cool, and just a little caffeinated… perfect for surviving the 3 p.m. slump!
14. Salted Caramel Pretzel Bars
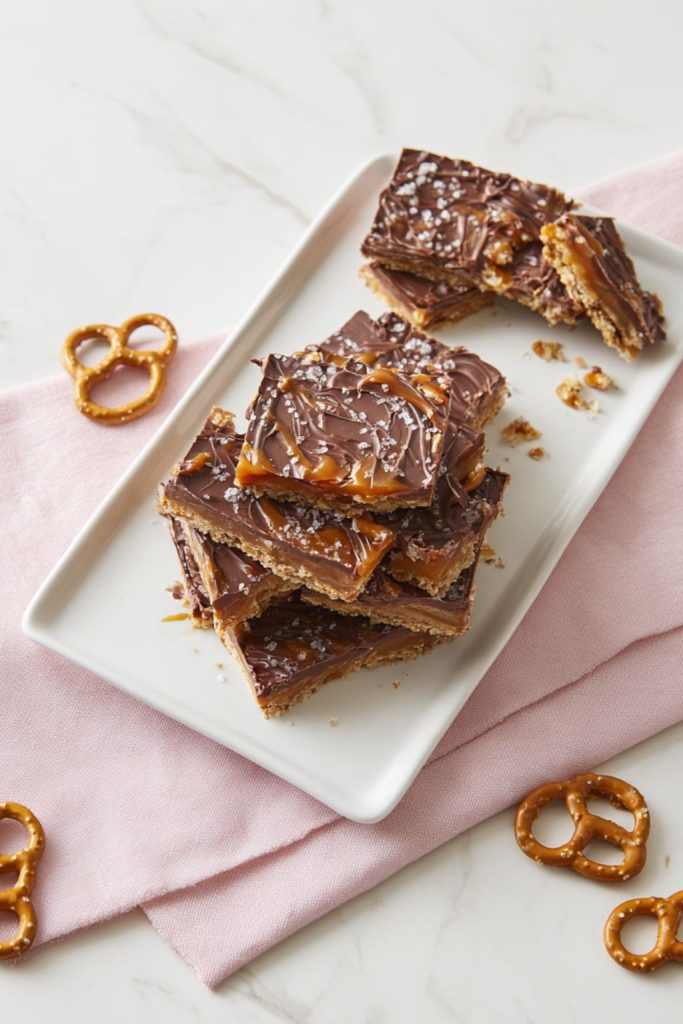
Sweet, salty, crunchy, these bars check ALL the boxes. They’ve got layers of pretzels, gooey caramel, and rich chocolate… but here’s the best part: no baking, no stovetop caramel drama. Just mix, pour, freeze, and try to resist cutting into them early (good luck with that).
They’re the kind of treat that makes you feel like a dessert genius with zero effort. Perfect for parties, holiday trays, or just sneaking a bite while pretending to organize the freezer.
Serves: 12 bars
Ingredients:
- 2 cups mini pretzels, roughly crushed
- ½ cup peanut butter or almond butter
- ¼ cup honey or maple syrup
- 8 pitted dates
- 2 tbsp melted butter or coconut oil
- 1 cup dark chocolate chips
- Pinch of flaky sea salt
Instructions:
- Line an 8×8-inch pan with parchment paper.
- In a food processor, blend dates, nut butter, honey, and butter until smooth and caramel-like.
- Stir in the crushed pretzels, it’ll be thick and sticky (that’s the good stuff).
- Press the mixture firmly into the pan and smooth out the top.
- Melt the chocolate chips and spread them over the pretzel layer.
- Sprinkle with flaky sea salt and freeze for at least 1 hour.
Freezer Tip:
Store in an airtight container for up to 2 months. Let sit for 5–10 minutes before eating for that perfect chewy-meets-crunchy texture… but honestly, they’re incredible right from the freezer too. You’ll want to keep a secret stash, trust me!
15. Peanut Butter Chocolate Chip Blender Muffins
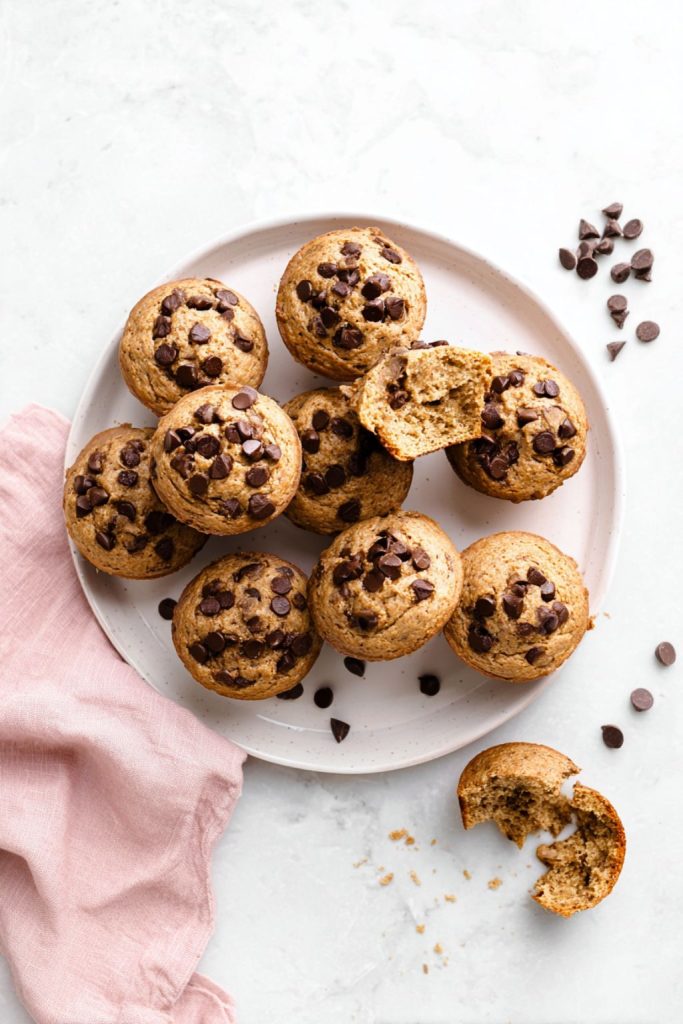
Okay, these muffins are about to be your new best friend. You throw everything into a blender, hit a button, and BOOM, batter done. They’re fluffy, peanut-buttery, and just sweet enough to feel like dessert… but still kinda breakfast-approved. (We love a multitasking treat!)
They freeze beautifully, reheat like a dream, and make your kitchen smell amazing without the whole “dirty every bowl in the house” situation.
Serves: 10 muffins
Ingredients:
- 1 cup rolled oats
- 2 ripe bananas
- ½ cup peanut butter
- 2 eggs
- 2 tbsp honey or maple syrup
- 1 tsp baking powder
- ½ tsp cinnamon
- 1 tsp vanilla extract
- Pinch of salt
- ¼ cup mini chocolate chips
Instructions:
- Preheat oven to 350°F (175°C) and line a muffin pan with paper liners.
- Add oats, bananas, peanut butter, eggs, honey, baking powder, cinnamon, vanilla, and salt to a blender.
- Blend until smooth and creamy, scraping down the sides if needed.
- Stir in chocolate chips (save a few for the tops!).
- Pour the batter into the muffin cups, about ¾ full.
- Bake for 15–18 minutes, until golden and set in the middle. Cool completely before freezing.
Freezer Tip:
Store in a freezer-safe bag for up to 3 months. Reheat in the microwave for 20–30 seconds and they taste freshly baked… warm, soft, and just the right amount of chocolatey. Perfect for breakfast, snacks, or when you just need a muffin moment!
Freezer desserts really are the secret weapon for busy days (and late-night cravings!). They’re easy to make, last for weeks, and somehow taste even better when you forget you had them stashed away.
I hope you found a few new FAVORITES to keep tucked in your freezer, the kind of treats you’ll come back to again and again when you want something homemade without the work. Thanks for reading!
If you loved these, you’ll probably want to check out these Meal Prep Ideas With Sweet Potatoes for more easy, make-ahead comfort food, or try these Healthy Snack Boxes for quick grab-and-go options during the week.