Ever try to eat lighter… and end up starving two hours later?! Yeah, we’ve all been there. You pack your lunch, feel good about your choices and then suddenly you’re raiding the snack drawer like it owes you money!
Finding meals that are both satisfying and under 500 calories can feel impossible, like you’ve gotta choose between flavor and fitting into your jeans. BUT here’s the thing… you don’t!
We rounded up 13 healthy meal prep meals under 500 calories that prove you can eat well, feel full, and still look forward to lunch every single day.
And hey, if you’ve ever thought “meal prep” meant spending your whole Sunday in the kitchen… nope! We’re keeping it simple, quick, and totally doable. You and I both know life gets busy, but these meals make it easier to stay on track AND enjoy every bite. So let’s get cooking… we’ve got some seriously good food coming your way!
Table of Contents
1. Buffalo Chicken Stuffed Peppers
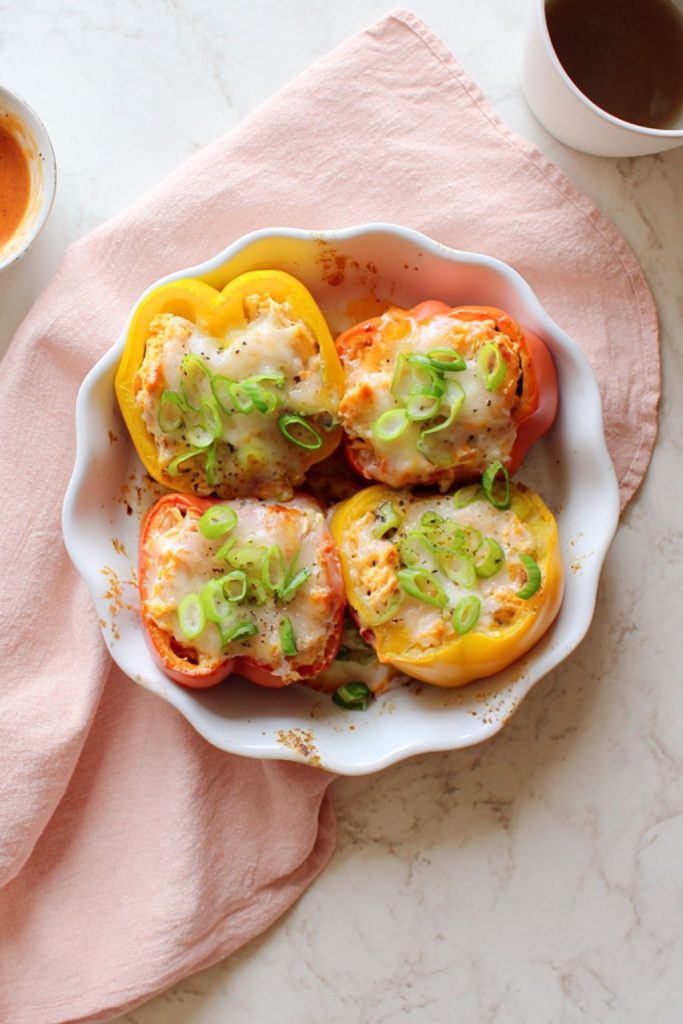
You know those nights when you just want something hot, cheesy, and a little bit spicy… but without totally wrecking your calorie count? These stuffed peppers have all the kick and comfort of wings, but in a light, balanced meal that actually makes you feel good afterward.
They’re saucy, satisfying, and surprisingly easy, you can meal prep a batch and have lunch (or dinner) ready for days.
Serves: 4
Per Serving (estimated):
Calories: 472
Protein: 38g
Carbs: 24g
Fat: 23g
Ingredients:
- 4 large bell peppers (any color), halved and seeds removed
- 1 lb cooked shredded chicken breast
- ⅓ cup plain Greek yogurt
- ¼ cup light cream cheese, softened
- ¼ cup hot sauce (like Frank’s RedHot)
- ½ tsp garlic powder
- ¼ tsp smoked paprika
- Salt and black pepper, to taste
- ½ cup shredded mozzarella or cheddar cheese
- 2 green onions, thinly sliced
Instructions:
- Preheat your oven to 400°F (200°C). Line a baking dish with foil or parchment for easy cleanup.
- In a large bowl, mix together the chicken, Greek yogurt, cream cheese, hot sauce, and seasonings until creamy and well combined.
- Spoon the mixture evenly into each pepper half and sprinkle with cheese.
- Bake for 20–25 minutes, until the peppers are tender and the tops are lightly golden.
- Sprinkle with green onions before serving (or packing up for the week!).
Storage Tip:
These keep beautifully in the fridge for up to 4 days. Reheat in the microwave or oven, and if you like a little extra heat, drizzle a bit more hot sauce right before serving. They taste just as good reheated (maybe even better… that sauce settles in overnight!).
2. Sweet Chili Shrimp & Pineapple Rice Bowls
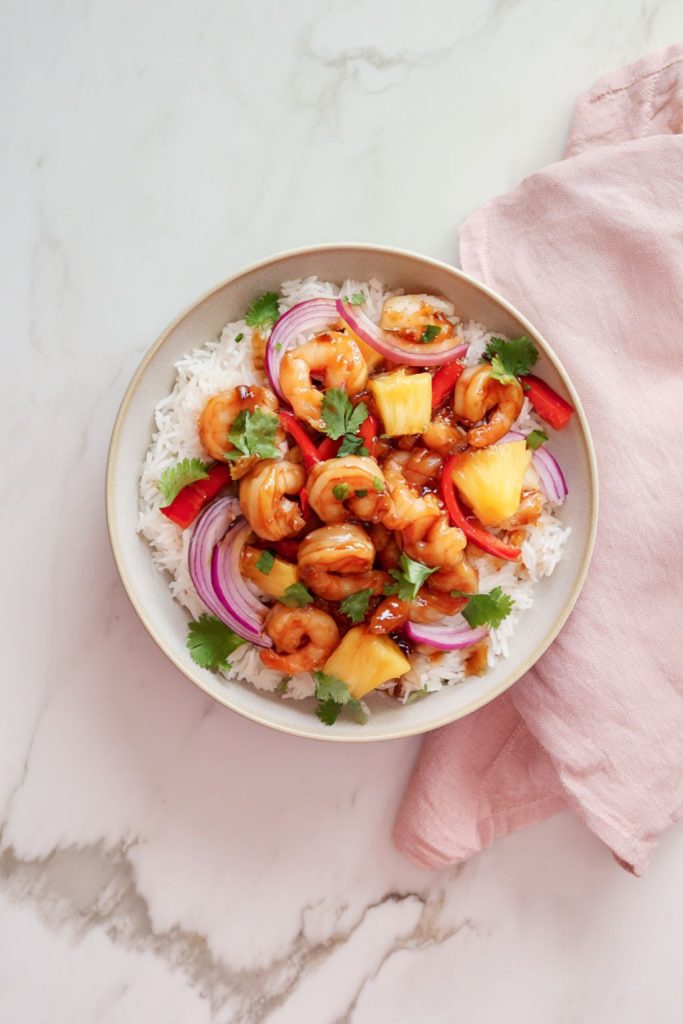
If you’ve ever wished takeout came with fewer calories and less guilt (but still tasted amazing), this is your kind of meal. These bowls are light, a little tropical, and just the RIGHT mix of sweet and spicy.
The pineapple adds that juicy pop that makes you feel like you’re on vacation… even if you’re just eating lunch at your desk.
It’s fresh, fast, and meal-prep magic, ready in under 25 minutes!
Serves: 4
Per Serving (estimated):
Calories: 465
Protein: 32g
Carbs: 45g
Fat: 15g
Ingredients:
- 1 lb large shrimp, peeled and deveined
- 2 cups cooked jasmine rice (or brown rice for extra fiber)
- 1 cup pineapple chunks (fresh or canned in juice, drained)
- 1 red bell pepper, sliced
- 1 small red onion, thinly sliced
- 2 tbsp olive oil
- ¼ cup sweet chili sauce
- 1 tbsp soy sauce
- Juice of ½ lime
- Salt and black pepper, to taste
- Optional: chopped cilantro or green onions for garnish
Instructions:
- Heat 1 tbsp olive oil in a large skillet over medium-high heat. Add shrimp and cook 1–2 minutes per side, until pink and cooked through. Remove and set aside.
- In the same pan, add another drizzle of oil along with the bell pepper and onion. Sauté for 3–4 minutes until tender-crisp.
- Stir in the pineapple, sweet chili sauce, soy sauce, and lime juice. Let it bubble for a minute to thicken slightly.
- Add the shrimp back in, toss to coat everything in that glossy, sweet-spicy sauce.
- Serve over rice and top with cilantro or green onions if you’re feelin’ fancy.
Storage Tip:
Keeps in the fridge for up to 3 days. Reheat gently in a skillet or microwave with a splash of water to loosen the sauce. It’s one of those meals that tastes even better the next day… the flavors really soak in.
3. Creamy Sun-Dried Tomato Turkey Skillet
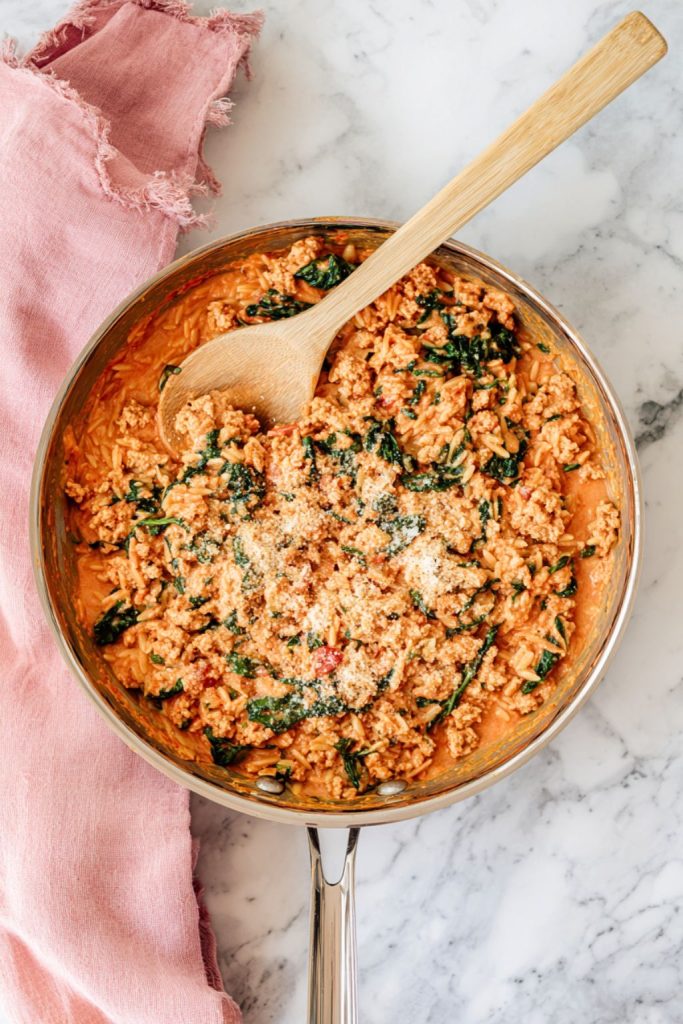
This one totally hits that sweet spot. It’s rich and saucy, but still under 500 calories, so you can feel good about going back for seconds (not that we’ve ever done that…).
We love this one for busy weeknights because it all happens in ONE pan. Less cleanup, more flavor, and dinner on the table before you can even decide what to watch on Netflix.
Serves: 4
Per Serving (estimated):
Calories: 478
Protein: 37g
Carbs: 28g
Fat: 21g
Ingredients:
- 1 lb lean ground turkey
- 1 tbsp olive oil
- 2 cloves garlic, minced
- ½ cup sun-dried tomatoes, chopped (the kind packed in oil, drained well)
- 2 cups baby spinach
- ¾ cup unsweetened almond milk (or skim milk)
- 2 tbsp light cream cheese
- ½ tsp Italian seasoning
- Salt and black pepper, to taste
- 1½ cups cooked orzo or whole-grain pasta
- Optional: sprinkle of grated Parmesan for serving
Instructions:
- Heat olive oil in a large skillet over medium heat. Add the ground turkey, breaking it up with a spatula. Cook until browned and no longer pink.
- Add garlic and sun-dried tomatoes, stir for about a minute until fragrant (smells amazing already, right?).
- Pour in the milk, cream cheese, and Italian seasoning. Stir until the sauce gets creamy and everything’s coated.
- Toss in the spinach and cooked orzo, letting it all warm through for a couple of minutes. Season with salt and pepper to taste.
- Serve it up and, if you’re like me, add a little sprinkle of Parmesan on top… because we all deserve a touch of cheese.
Storage Tip:
This one reheats like a dream, store it in the fridge for up to 4 days. Add a splash of milk or water before reheating to bring that creamy texture right back. Perfect for a cozy lunch that doesn’t taste like leftovers!
4. Cilantro Lime Chicken with Fiesta Veggies
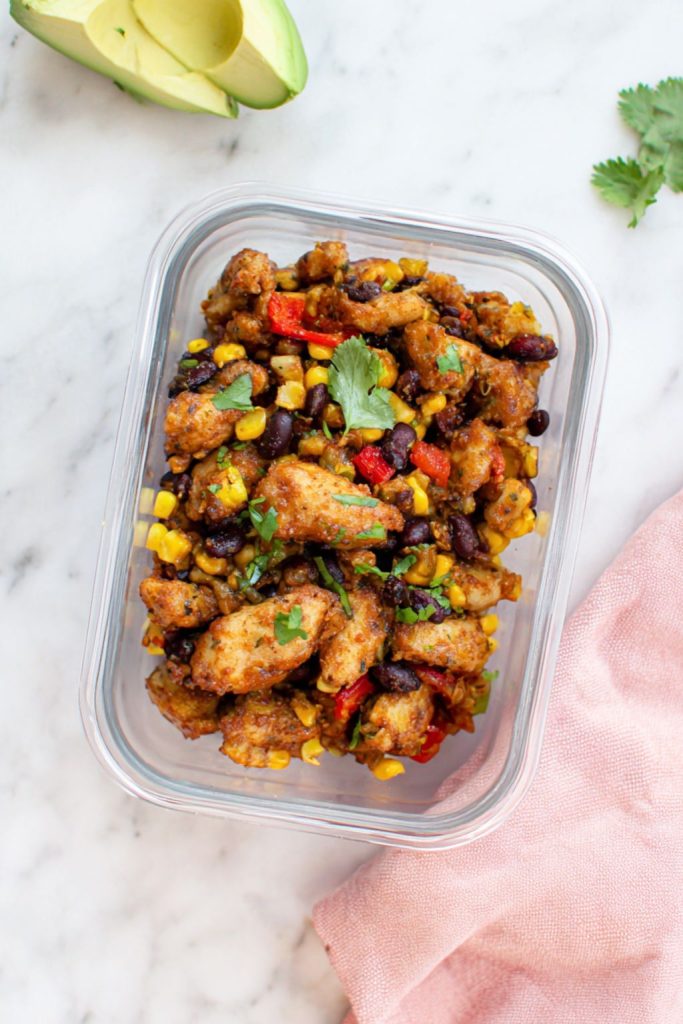
If you’ve ever wished you could bottle up the flavor of taco night and take it to work with you… this is basically that. Juicy chicken, bright lime, colorful veggies, it’s fresh, zesty, and somehow still comforting. It’s one of those throw-it-all-in-the-pan meals that makes you look like you really tried!
Serves: 4
Per Serving (estimated):
Calories: 462
Protein: 40g
Carbs: 32g
Fat: 17g
Ingredients:
- 1½ lbs boneless, skinless chicken breasts, cut into bite-sized pieces
- 2 tbsp olive oil, divided
- 1 red bell pepper, chopped
- 1 cup corn kernels (fresh or frozen)
- 1 can (15 oz) black beans, drained and rinsed
- Juice and zest of 1 lime
- 1 tsp chili powder
- ½ tsp cumin
- Salt and black pepper, to taste
- 2 tbsp chopped fresh cilantro
- Optional toppings: avocado slices or a little shredded cheese
Instructions:
- Heat 1 tbsp olive oil in a large skillet over medium-high heat. Add the chicken and season with chili powder, cumin, salt, and pepper. Cook 6–7 minutes until browned and cooked through. Remove and set aside.
- In the same pan, add the remaining olive oil, bell pepper, and corn. Cook 3–4 minutes until slightly charred.
- Stir in the black beans, lime juice, and zest, then toss the chicken back in.
- Sprinkle with cilantro, give it all a good toss, and taste, you’ll probably want another squeeze of lime (trust me on that).
- Serve it up or pack into containers with some brown rice or quinoa for an easy grab-and-go meal.
Storage Tip:
Keeps well in the fridge for up to 4 days. Add a tiny splash of water or lime juice before reheating to keep everything fresh and bright. It’s one of those meals that somehow tastes even better cold the next day, kind of like taco leftovers, but healthier!
5. Thai Basil Tofu & Veggie Stir-Fry
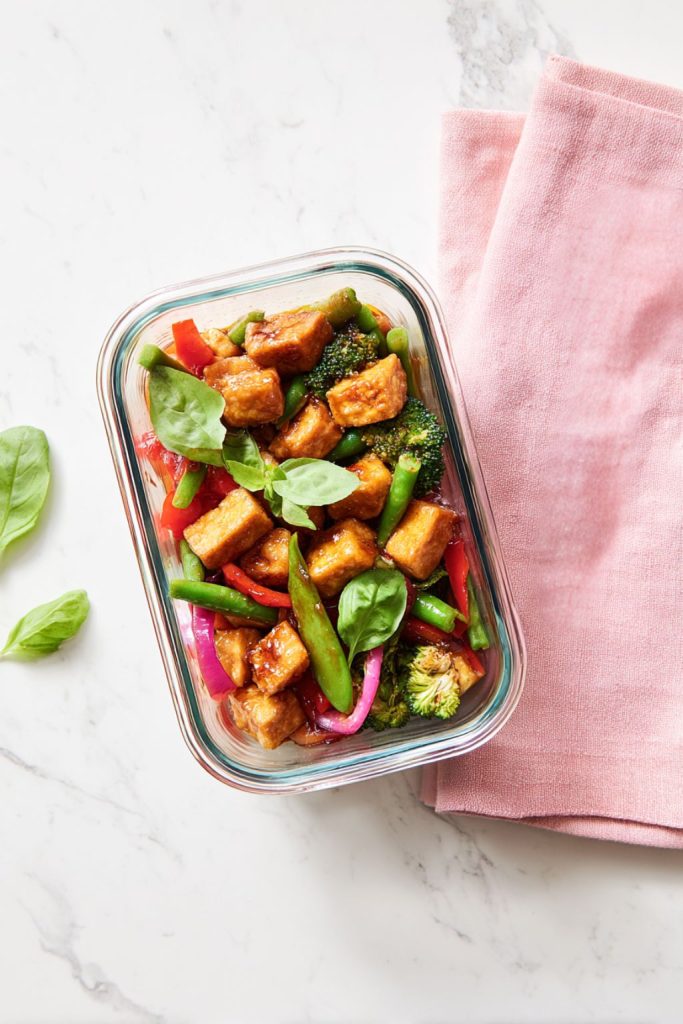
Okay, hear me out this one might actually make you love tofu (yes, really). Crispy on the outside, tender inside, and coated in that garlicky, slightly sweet basil sauce that smells SO good you’ll want to drink it straight from the pan…
It’s one of those quick, feel-good meals that works for lunch or dinner, flavorful, filling, and ready in about 20 minutes.
Serves: 4
Per Serving (estimated):
Calories: 438
Protein: 26g
Carbs: 28g
Fat: 21g
Ingredients:
- 14 oz firm tofu, pressed and cubed
- 2 tbsp cornstarch
- 2 tbsp olive oil (or sesame oil for more flavor)
- 2 cups mixed veggies (like bell peppers, snap peas, or broccoli)
- 3 cloves garlic, minced
- ¼ cup low-sodium soy sauce
- 2 tbsp honey or maple syrup
- 1 tbsp rice vinegar
- ¼ tsp chili flakes (optional for heat)
- ½ cup fresh basil leaves (Thai basil if you can find it!)
- Cooked jasmine rice, for serving
Instructions:
- Toss the tofu cubes with cornstarch until coated, this is what gives that crispy edge we all love.
- Heat oil in a large nonstick skillet over medium-high heat. Add tofu and cook 6–8 minutes, turning occasionally until golden on all sides. Remove and set aside.
- In the same pan, add the veggies and sauté 3–4 minutes until tender-crisp.
- Stir in garlic, soy sauce, honey, vinegar, and chili flakes. Let it bubble for a minute, then add the tofu back in.
- Toss in the fresh basil right at the end, it’ll wilt just enough and smell amazing. Serve over rice and feel proud of yourself for eating a plant-based dinner that actually tastes good!
Storage Tip:
Keeps in the fridge for up to 4 days. Reheat in a skillet (to keep that tofu a little crisp) or the microwave if you’re short on time. Add a tiny splash of soy sauce before serving to freshen it up, easy, flavorful, and no takeout needed.
6. Honey Garlic Pork Tenderloin with Roasted Carrots
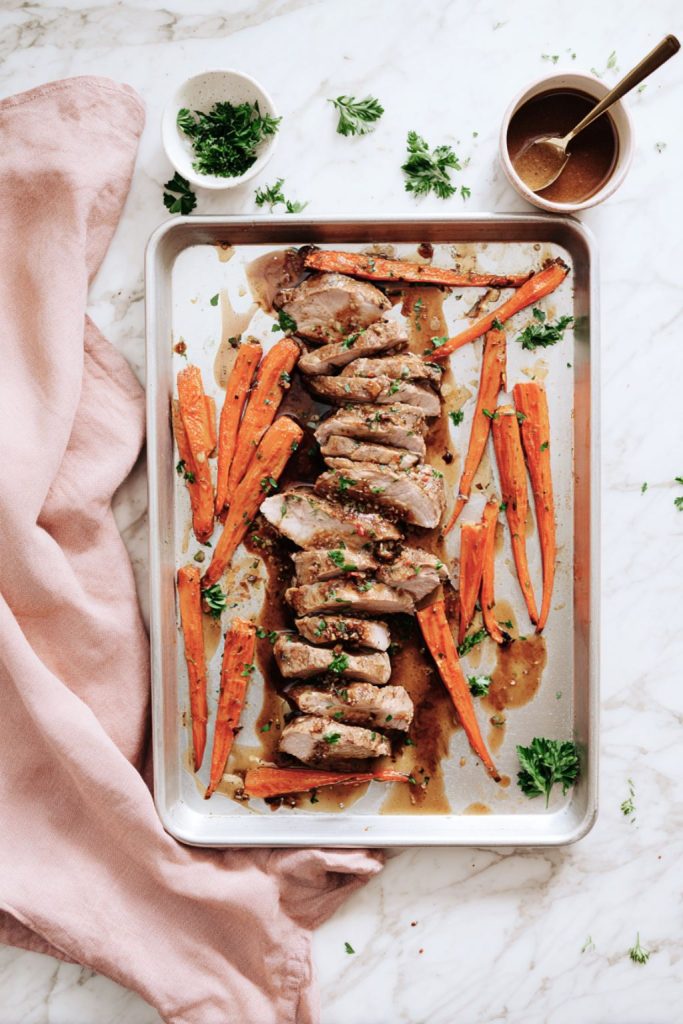
This one feels a little fancy, but it’s secretly one of the easiest dinners ever. Juicy pork, caramelized carrots, and that sticky honey-garlic glaze that makes everything taste like a Sunday roast… except it’s Tuesday, and you’ve got twenty minutes!
Serves: 4
Per Serving (estimated):
Calories: 471
Protein: 39g
Carbs: 31g
Fat: 18g
Ingredients:
- 1 lb pork tenderloin, trimmed
- 1 lb carrots, peeled and sliced on a diagonal
- 1 tbsp olive oil
- 2 tbsp honey
- 2 cloves garlic, minced
- 1 tbsp soy sauce
- 1 tbsp Dijon mustard
- Salt and black pepper, to taste
- Optional: chopped parsley for garnish
Instructions:
- Preheat your oven to 425°F (220°C). Line a sheet pan with parchment paper.
- Place carrots on one side of the pan, drizzle with half the olive oil, and season with salt and pepper.
- In a small bowl, whisk together honey, garlic, soy sauce, and mustard.
- Rub the pork with the remaining olive oil and a little salt and pepper, then lay it next to the carrots on the pan.
- Brush half the honey-garlic glaze over the pork and roast for 15–20 minutes, brushing again halfway through.
- Let it rest a few minutes before slicing. Drizzle everything with the remaining glaze, because that sauce deserves a moment.
Storage Tip:
Keeps in the fridge for up to 4 days. When reheating, spoon a little of the pan juices (or a splash of water) over the pork to keep it juicy. Pairs perfectly with brown rice or quinoa if you want to stretch it into extra lunches!
7. Spinach & Feta Turkey Meatloaf Muffins
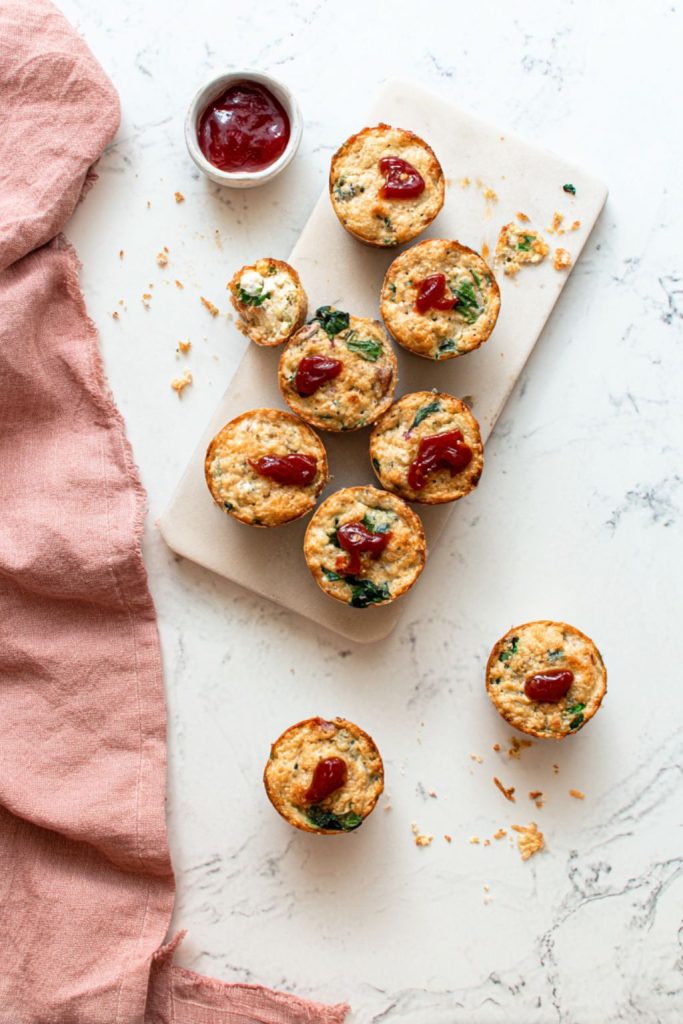
These little guys are everything we LOVE about classic meatloaf, just made lighter and perfectly portioned! Plus, baking them in muffin tins means they cook faster and look cute while doing it.
They’re packed with protein, feta for flavor, and spinach for that little “look at me eating my greens” moment. Great for meal prep, quick lunches, or those nights when you just need something simple and comforting.
Serves: 6 (makes about 12 muffins)
Per Serving (estimated):
Calories: 458
Protein: 41g
Carbs: 19g
Fat: 21g
Ingredients:
- 1½ lbs lean ground turkey
- 1 cup chopped spinach (fresh or frozen, just squeeze out the water)
- ½ cup rolled oats
- ½ cup crumbled feta cheese
- 1 small onion, finely diced
- 1 large egg
- 2 tbsp ketchup (plus extra for topping)
- 1 tsp garlic powder
- 1 tsp dried oregano
- Salt and black pepper, to taste
Instructions:
- Preheat your oven to 400°F (200°C). Spray a 12-cup muffin tin with nonstick spray or line with silicone cups.
- In a large bowl, mix together all the ingredients until just combined, don’t overmix or they’ll get tough!
- Scoop the mixture evenly into the muffin tin (an ice cream scoop works great).
- Add a small dab of ketchup on top of each one if you’re a classic meatloaf person like me.
- Bake for 20–25 minutes, until cooked through and lightly golden on top. Let them rest a few minutes before removing.
Storage Tip:
Store in the fridge for up to 5 days or freeze for up to 2 months. Reheat in the microwave or oven, and if you want them extra juicy, drizzle a little broth or tomato sauce on top before reheating. These make the BEST grab-and-go lunches with a side of roasted veggies or mashed cauliflower!
8. Cajun Salmon Grain Bowls
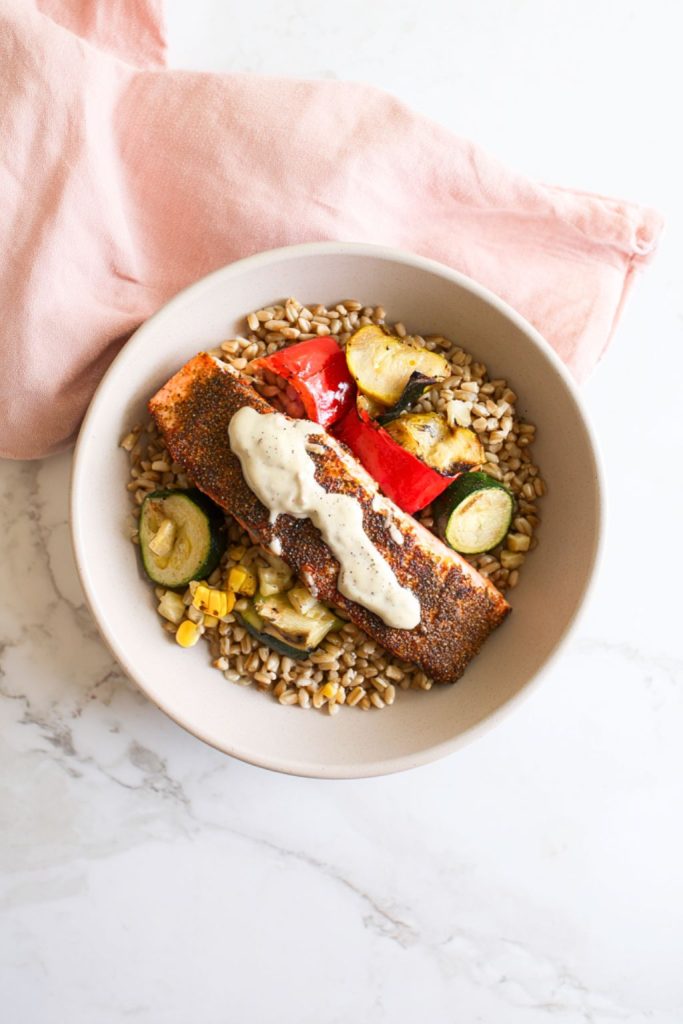
If you ever wish your meal prep tasted a little more like a weekend dinner out, this one’s for you. These bowls have that smoky-spicy Cajun kick with tender salmon and nutty farro (or brown rice if that’s what you’ve got). It’s one of those “wow, I actually made this” meals but we’ll keep that part between us 😋
Serves: 4
Per Serving (estimated):
Calories: 489
Protein: 42g
Carbs: 36g
Fat: 18g
Ingredients:
- 4 salmon fillets (about 4–5 oz each)
- 1½ tbsp olive oil
- 1 tbsp Cajun seasoning (store-bought or homemade)
- 1 cup cooked farro or brown rice
- 1 red bell pepper, chopped
- 1 small zucchini, sliced
- ½ cup corn kernels
- Juice of ½ lemon
- ¼ cup plain Greek yogurt
- 1 tsp hot sauce (optional)
- Salt and black pepper, to taste
Instructions:
- Preheat oven to 400°F (200°C) and line a sheet pan with parchment paper.
- Rub the salmon with olive oil and Cajun seasoning, then place on the pan with the chopped veggies. Drizzle everything with a little more olive oil and a pinch of salt.
- Roast for 12–15 minutes, until the salmon flakes easily and the veggies are tender.
- In a small bowl, mix Greek yogurt, lemon juice, and hot sauce to make a quick creamy drizzle.
- Assemble your bowls with farro on the bottom, then top with veggies, salmon, and that lemony yogurt sauce.
Storage Tip:
Keeps in the fridge for up to 3 days. Reheat gently or enjoy it cold, the flavors actually pop more the next day. Pro tip: squeeze a little extra lemon before eating… it wakes everything right up!
9. Mediterranean Chickpea Couscous Boxes
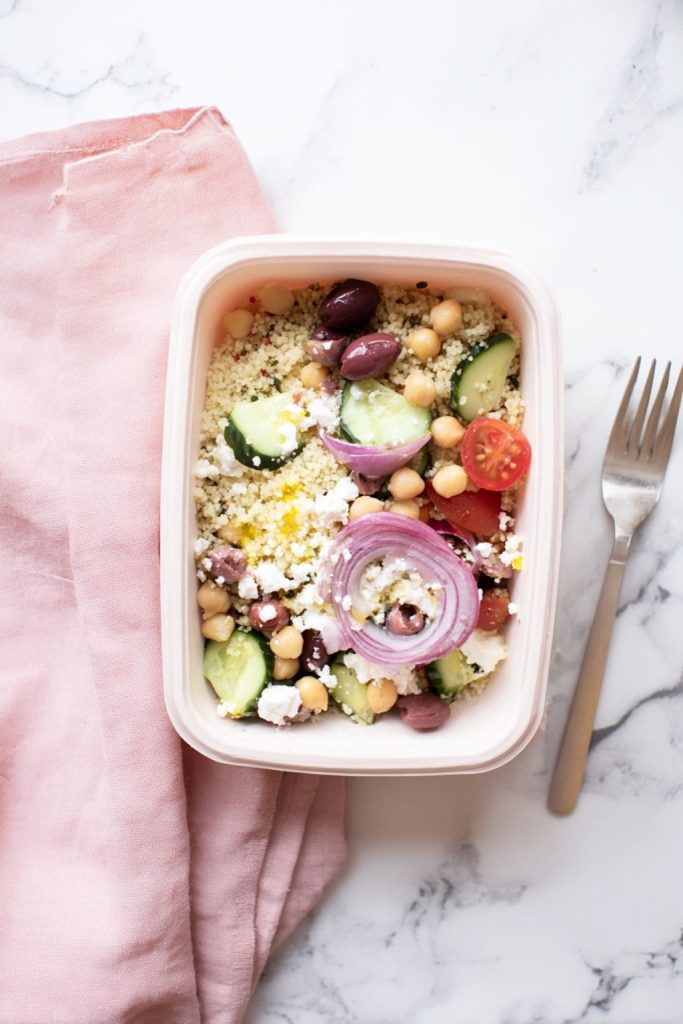
You know those meals that somehow taste even BETTER straight from the fridge?! It’s light, tangy, and full of that Mediterranean flavor we all crave: chickpeas, feta, lemon, herbs… the whole thing just works.
We love this for busy weeks because it takes almost no effort (no stove drama, no fancy tools) but still feels like a real meal!
Serves: 4
Per Serving (estimated):
Calories: 441
Protein: 19g
Carbs: 52g
Fat: 16g
Ingredients:
- 1 cup dry couscous (or quinoa if you want it gluten-free)
- 1 can (15 oz) chickpeas, drained and rinsed
- 1 cup cherry tomatoes, halved
- ½ cucumber, diced
- ¼ cup red onion, finely chopped
- ¼ cup Kalamata olives, sliced
- ⅓ cup crumbled feta cheese
- 2 tbsp olive oil
- Juice of 1 lemon
- 1 tsp dried oregano
- Salt and black pepper, to taste
- Optional: handful of chopped parsley or mint
Instructions:
- Cook the couscous according to package directions (it only takes about 5 minutes, love that!). Fluff with a fork and let cool slightly.
- In a big bowl, toss together couscous, chickpeas, tomatoes, cucumber, onion, and olives.
- In a small jar or bowl, whisk olive oil, lemon juice, oregano, salt, and pepper. Pour it over the salad and toss to coat.
- Add the feta and herbs right before serving, that keeps everything fresh and bright.
Storage Tip:
Stays fresh in the fridge for up to 4 days. If it looks a little dry after chilling, just add a drizzle of olive oil or lemon juice and give it a quick toss. It’s the kind of lunch you’ll actually look forward to, no microwave required!
10. Maple-Mustard Chicken & Apple Slaw Boxes
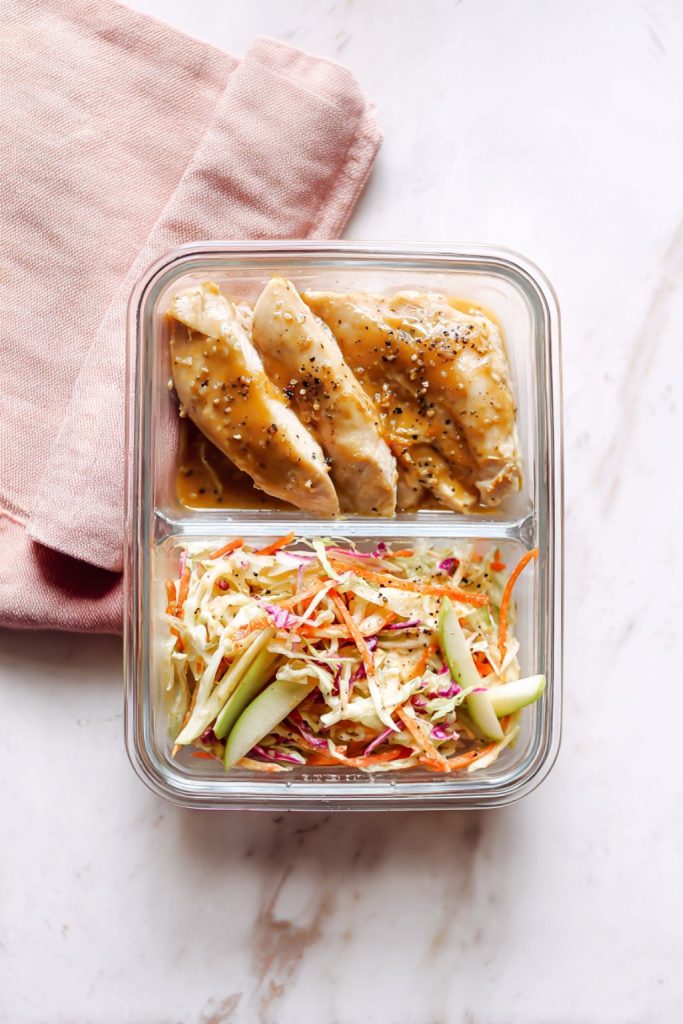
These boxes are fresh, high-protein, and perfect when you want something light but still satisfying. We really love them for lunch because they stay crunchy and flavorful all week… no soggy slaw in sight!
Serves: 4
Per Serving (estimated):
Calories: 452
Protein: 39g
Carbs: 29g
Fat: 18g
Ingredients:
- 1½ lbs boneless, skinless chicken breasts
- 1 tbsp olive oil
- 2 tbsp Dijon mustard
- 1 tbsp maple syrup (or honey)
- 1 tbsp apple cider vinegar
- 1 small garlic clove, minced
- Salt and black pepper, to taste
- 2 cups shredded cabbage (or coleslaw mix)
- 1 green apple, julienned or thinly sliced
- ½ cup shredded carrots
- 2 tbsp plain Greek yogurt
- 1 tbsp mayonnaise (optional, for creaminess)
- 1 tsp lemon juice
Instructions:
- In a small bowl, whisk together Dijon, maple syrup, vinegar, garlic, salt, and pepper.
- Heat olive oil in a skillet over medium heat. Add the chicken and cook 5–6 minutes per side, brushing with half of the maple-mustard sauce until golden and cooked through.
- Remove from heat, slice, and toss in the rest of the sauce to coat.
- In a large bowl, mix cabbage, apple, carrots, Greek yogurt, mayo (if using), and lemon juice. Season with salt and pepper and toss well.
- Divide the slaw into containers and top with sliced chicken.
Storage Tip:
Stays fresh for up to 4 days in the fridge. If you like a little extra crunch, keep the slaw and chicken stored separately until you’re ready to eat, then toss them together right before serving. That sauce over the chicken? Oh yeah… it just gets better every day.
11. Teriyaki Eggplant & Ground Turkey Rice Bowls
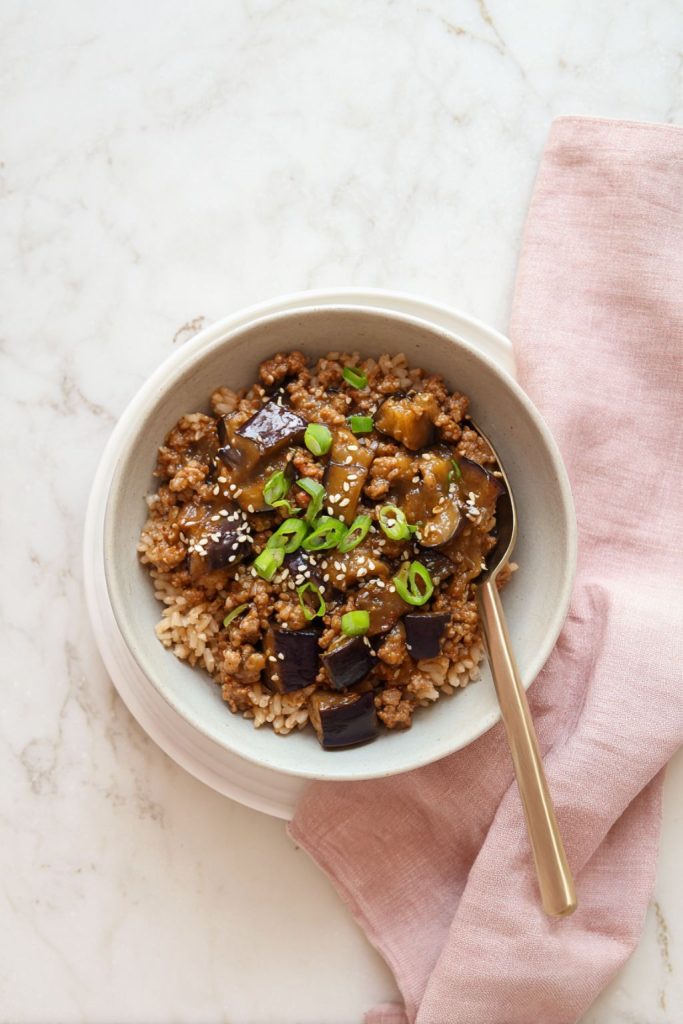
So… eggplant doesn’t get enough love. When it’s cooked right, it soaks up all that teriyaki sauce like a flavor sponge (in the BEST way).
Mix it with lean ground turkey, a little rice, and boom, you’ve got a seriously good weeknight meal that tastes like it came from your favorite Asian spot.
Serves: 4
Per Serving (estimated):
Calories: 467
Protein: 36g
Carbs: 40g
Fat: 16g
Ingredients:
- 1 lb lean ground turkey
- 1 medium eggplant, diced (about 3 cups)
- 1 tbsp sesame oil (or olive oil)
- 2 cloves garlic, minced
- 2 tbsp low-sodium soy sauce
- 1 tbsp honey or brown sugar
- 1 tbsp rice vinegar
- ½ tsp grated fresh ginger (or ¼ tsp dried)
- 1 tsp cornstarch mixed with 2 tbsp water (for thickening)
- 2 cups cooked brown rice
- Optional toppings: sliced green onions, sesame seeds
Instructions:
- Heat the sesame oil in a large skillet over medium-high heat. Add the ground turkey and cook until browned, breaking it apart with a spatula.
- Add the diced eggplant and a pinch of salt, cooking for about 5–6 minutes until it softens and starts to caramelize.
- Stir in garlic, soy sauce, honey, vinegar, and ginger. Let it simmer for a minute.
- Add the cornstarch mixture, stir well, and cook until the sauce thickens and coats everything nicely.
- Spoon over brown rice and top with green onions or sesame seeds if you’re feeling fancy.
Storage Tip:
Keeps in the fridge for up to 4 days. Reheat in a skillet with a splash of water or soy sauce to bring that glossy texture back. It’s one of those meals that somehow tastes even better after a night in the fridge… like all the best takeout does!
12. Zesty Lemon Lentil Soup with Parmesan Croutons
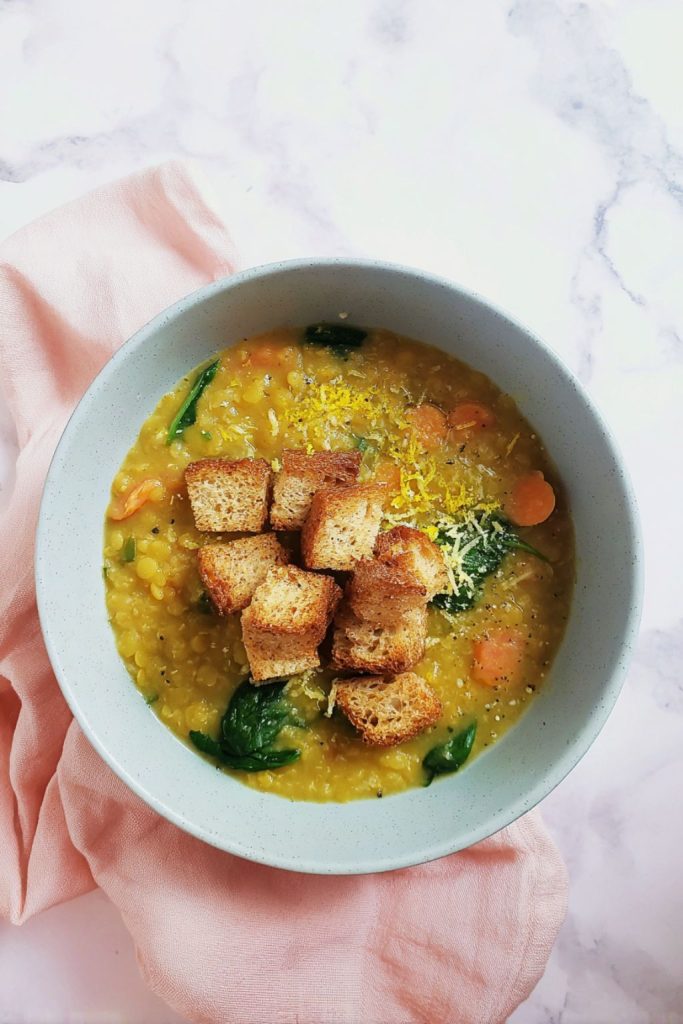
You know those days when you just want something warm and satisfying that doesn’t weigh you down? Trust on this ONE! It’s hearty from the lentils, fresh from the lemon, and just a little indulgent with those crispy Parmesan croutons on top (you’ve earned them, trust me).
It’s light but filling, the kind of soup that makes you feel good from the inside out.
Serves: 4–6
Per Serving (estimated):
Calories: 433
Protein: 27g
Carbs: 48g
Fat: 12g
Ingredients:
- 1 tbsp olive oil
- 1 small onion, diced
- 2 carrots, chopped
- 2 celery stalks, chopped
- 3 cloves garlic, minced
- 1½ cups dried red or green lentils, rinsed
- 6 cups low-sodium vegetable or chicken broth
- 1 tsp dried thyme
- Juice and zest of 1 lemon
- Salt and black pepper, to taste
- 2 cups baby spinach (optional but highly recommended)
- 2 slices whole-grain bread, cubed
- 1 tbsp olive oil (for the croutons)
- 2 tbsp grated Parmesan cheese
Instructions:
- Heat olive oil in a large pot over medium heat. Add onion, carrots, and celery; cook until softened, about 5 minutes.
- Add garlic and thyme, cook another 30 seconds until fragrant.
- Stir in lentils and broth. Bring to a boil, then reduce heat and simmer for 20–25 minutes until lentils are tender.
- Stir in lemon juice, zest, and spinach until wilted. Season with salt and pepper to taste.
- Meanwhile, toss bread cubes with olive oil and Parmesan, then bake at 400°F (200°C) for about 8–10 minutes until golden.
- Serve the soup topped with the crispy croutons, because every good soup deserves a little crunch.
Storage Tip:
Keeps in the fridge for up to 5 days or freeze for up to 2 months. The lentils thicken a bit as it sits, so add a splash of broth or water when reheating. And don’t skip that squeeze of fresh lemon before eating, it totally wakes it up!
13. Balsamic Chicken & Roasted Grape Quinoa Bowls
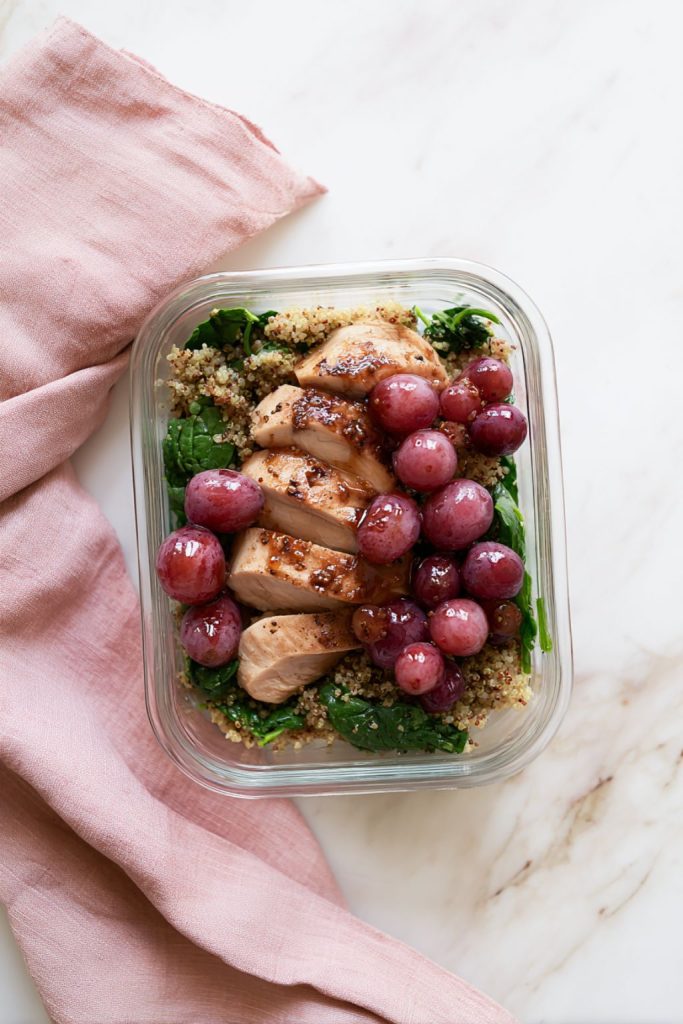
I know what you’re thinking… grapes? In a meal prep bowl? But hear me out, once you roast them, they get all jammy and sweet, and when they mix with that balsamic glaze and juicy chicken, it’s absolute magic.
It’s a little sweet, a little tangy, and somehow feels like something you’d get at a trendy café, but we’re making it right in our own kitchen (comfy clothes and all)!
Serves: 4
Per Serving (estimated):
Calories: 454
Protein: 40g
Carbs: 34g
Fat: 15g
Ingredients:
- 1½ lbs boneless, skinless chicken breasts
- 2 cups seedless red grapes
- 1 tbsp olive oil
- 2 tbsp balsamic vinegar
- 1 tbsp honey
- 1 cup uncooked quinoa
- 2 cups low-sodium chicken broth (or water)
- 1 cup baby spinach
- Salt and black pepper, to taste
- Optional: extra balsamic glaze for drizzling
Instructions:
- Preheat your oven to 425°F (220°C). Line a sheet pan with parchment.
- Toss grapes with ½ tbsp olive oil and a pinch of salt. Spread on one side of the pan.
- On the other side, place chicken breasts, drizzle with the remaining olive oil, and season with salt and pepper.
- Roast everything for about 20–22 minutes, until the chicken is cooked through and the grapes are blistered and juicy.
- Meanwhile, cook quinoa in broth according to package directions. Fluff with a fork and stir in spinach until wilted.
- Whisk balsamic vinegar and honey together, then drizzle over the roasted chicken and grapes.
- Build your bowls with quinoa-spinach base, sliced chicken, roasted grapes, and a drizzle of that tangy-sweet glaze.
Storage Tip:
Keeps in the fridge for up to 4 days. Reheat gently or enjoy cold, it’s honestly delicious both ways. If you’ve got a little extra balsamic glaze, drizzle it right before eating… it ties everything together perfectly.
I HOPE you found a few new favorites here, the kind you’ll keep making on repeat because they actually make healthy eating feel easy. Thanks for reading and cooking along with me!
If you’re ready for more meal prep inspiration, check these out next: